Custom email reports
App Center has a feature and a dedicated API for sending and scheduling custom email reports for app users.
A custom email report consists of a template and changeable parts that can contain data that you'd like to share with users.
Restrictions:
- You can't send marketing emails as custom email reports.
- Email notifications are turned off by default.
- Email size can't exceed 100 kB.
- Attachments aren't allowed by default. Attachment size can't exceed 25 MB. To enable attachments, contact your Account Manager.
Set up custom email reports
To set up custom email reports, do the following:
- Reach out to your Account Manager to discuss possible email content.
- Discuss the final email version with the App Center Team.
- Implement the consent flow to get the users' consent for the custom emails.
- Implement the integration with the notifications API.
- Wait for the App Center Team to create the custom template for you.
- Test the integration.
- Get approval from the App Center Team.
- Release the custom email.
The development work you need to do is described in more detail in the following sections.
Implement consent flow for users
To send custom emails, you must implement the user consent flow that lets users control specific email notifications. To do that:
- Check the
email_subscription.statefield in JWT. If the value is
STATE_UNSPECIFIED, show users a pop-up for allowing using theSM.client('requestEmailReports')method. If users close it without making a decision, you can show this pop-up once a week. If users block notifications, you can show it once a month.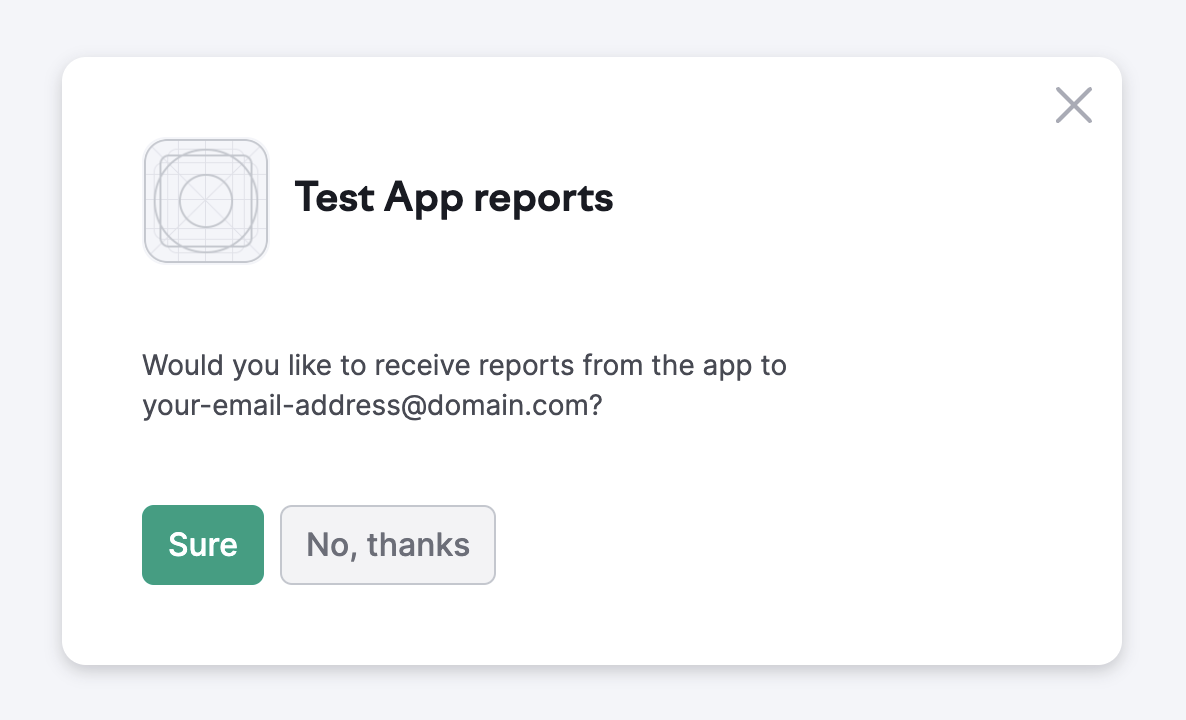
If the value is
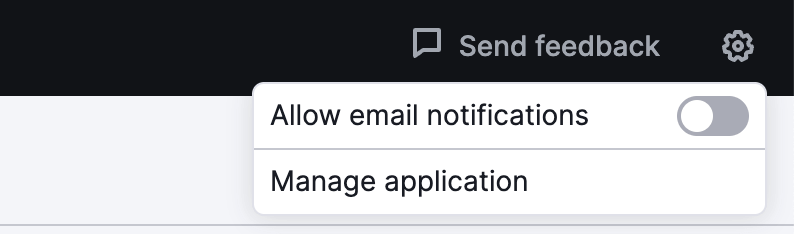
UNSUBSCRIBED, suggest these options to the users:- Follow the link to the Semrush notification settings page to change their notification status.
Click the gear icon at the top right of the app page and use the toggle switch.
Show available email subscriptions to users
To list the email subscriptions available for users in your app, make a GET request to the /apis/v4/hermes/v0/subscriptions endpoint.
GET https://api.semrush.com/apis/v4/hermes/v0/subscriptions
Authorization: Bearer YOUR_TOKEN
If the validation is successful, you will receive the following response:
{
 "meta": {
   "success": true,
   "status_code": 200,
   "request_id": "593747832b2c4b1882342a50b30710f6"
 },

 "data": {
   "subscriptions": [
     {
       "id": 123,
       "name": "AppName notifications",
       "description": "Sufficient changes on your projects positions",
       "trigger": "appname-notifications"
     }
   ]
 }
}
Email subscription data:
id: Email subscription ID.name: Email subscription name.description: Short description of the email.trigger: Name of the event triggering the email notification.
Check email subscription status
To check the status of a particular email subscription for a user in your app, make a GET request to the
https://api.semrush.com/apis/v4/hermes/v0/user/<user_id>/subscription/<subscription_id> endpoint.
For example, the user ID is 999, and the email subscription ID is 123.
GET https://api.semrush.com/apis/v4/hermes/v0/user/999/subscription/123
Authorization: Bearer YOUR_TOKEN
If the validation is successful, you will receive the following response:
{
 "meta": {
   "success": true,
   "status_code": 200,
   "request_id": "4f18531a5d799a0f793828c32caf97ba"
 },

 "data": {
   "active": true
 }
}
If the user isn't subscribed, the data field in the response will be empty.
Send emails after events
To send an email notification after an event, make a POST request to the https://api.semrush.com/apis/v4/hermes/v0/event endpoint.
POST https://api.semrush.com/apis/v4/hermes/v0/event
Authorization: Bearer YOUR_TOKEN

{
  "type": "your-event-type-name",
  "id": "68e9c11f-583b-4dd0-b23c-ab1269067ac7",
  "userId": 999,
  "data":  "eyJkY...mFsdWUxIn0=",
  "attachments": [
    {
      "name": "report-202X-XX-XX.pdf",
      "mime": "application/pdf",
      "content": "dakY...mFsdfDUxss"
    }
  ]
}
Request fields:
type: Event type name, the one you got after the setup step.id: Unique identifier of the event UUID generated by you. It's required to avoid sending multiple messages for one event occurrence.userId: Semrush user ID to send emails to.data: Base64-encoded JSON string, containing all required variables to render the email from the template for the event. Discuss the template and variables with your Account Manager.attachments(optional): List of files attached to the notification. The content of the files must be encoded as Base64. Only theapplication/pdfMIME type is allowed.
The endpoint returns the HTTP 201 code when the event is accepted and queued for processing.
In case of an error, it's safe to retry the request saving the id as many times as required.
Use UUID of version 4 to generate IDs.
Event queuing doesn't necessarily mean the user will be notified. The App Center backend checks user email notifications, app subscriptions, user preferences, and limits during event processing.
Check event status
To get information about your event, make a GET request to the /apis/v4/hermes/v0/event/<event_ID> endpoint.
GET https://api.semrush.com/apis/v4/hermes/v0/event/68e9c11f-583b-4dd0-b23c-ab1269067ac7
Authorization: Bearer YOUR_TOKEN
If the validation is successful, you will receive the following response:
{
 "meta": {
   "success": true,
   "status_code": 200,
   "request_id": "a39eb036f639a89778a2460173a97b24"
 },

 "data": {
   "id": "68e9c11f-583b-4dd0-b23c-ab1269067ac7",
   "ts": "2022-09-28T13:13:39.847733Z",
   "state": 3,
   "state_on": "2022-09-28T13:13:39.851285Z",
   "decision": "notify",
   "actions": [
     {
       "id": "76f9f19a-082a-40ab-8f19-9aa0f28e5036",
       "ts": "2022-09-28T13:13:39.851285Z",
       "type": "notification",
       "notification": {

         "channel": "email",
         "subscription_id": "123",
         "recipient_id": "321"
       }
     }
   ]
 }
}
In the data field, you can find information about the requested event:
id: Event ID.ts: Time of event registration.state: Current event processing state, which has five options:1: Event is registered and awaits further processing.2: Event processing is postponed due to user configuration or limits.3: Event is processed, and respective actions scheduled.4: Event is ignored,decisionfield contains a reason.5: The event processing was abandoned based on internal rules, thedecisionfield contains a reason.
state_on: Time when the event reached the one of the states listed earlier.decision: An extended description of the state, explainingstatereason, if applicable.actions: List of actions to be taken when the event occurs.
The actions data fields are as follows:
id: Action ID.ts: Timestamp of action registration in the system.type: Action type. Possible value:notification.
Encode request data
To fill in the template you need a variable and data to put in the variable.
For example, the variable is data_key and the value is data_value.
Put it in JSON {"data_key":"data_value1"} and encode it as a Base64 string.
The JSON file size before Base64 encoding must be less than 100 kB.
Examples for popular programming languages:
JavaScript:
btoa(JSON.stringify({"data_key":"data_value1"}))Python:
base64.b64encode(json.dumps({"data_key":"data_value"}).encode('utf-8'))Golang:
b64.StdEncoding.EncodeToString([]byte(`{"data_key":"data_value1"}`))The result will be the same for all the examples:
an encoded eyJkYXRhX2tleSI6ImRhdGFfdmFsdWUxIn0= string that should be used as the data field value.
You can use any JSON-supported data type that works best to deliver your information to the recipient.
The template could change within the development process. If you want to add a new field for data or change an existing one, discuss it with the App Center Team.