Quiz Maker is an app by Riddle that allows you to create interactive content, such as quizzes, surveys, personality tests, prediction games and leaderboards, for your audience across various devices and locations.
Its block-based content builder provides freedom to craft the content to your needs and includes AI assistance to help you with your creations. It’s available in the Semrush App Center.
The Benefits of Quiz Maker
The interactive content-focused features of Quiz Maker make it useful for a range of purposes. You can use it to:
- Increase user engagement and time on site with interactive pieces of content
- Collect more zero-party data and more qualitative leads with in-quiz forms
- Widen the net for your content by embedding it on the web or in apps
- Reach more people with competitions and prize draws online and during live events
- Understand your audience and how it interacts with content you create
Quiz Maker offers a wide range of formats to suit all your interactive content needs and give you a better grasp of a growing customer base.
Pricing and Limits
Quiz Maker costs $69/month and includes 10,000 completions and 5 AI-generated quizzes per month. A subscription includes unlimited manual and visual testing on desktop and mobile, as well as testing across multiple geolocations.
Via in-app purchases, you can add 10,000 more completions and 5 more AI-generated quizzes to your subscription for an extra $29/month and $9/month respectively.
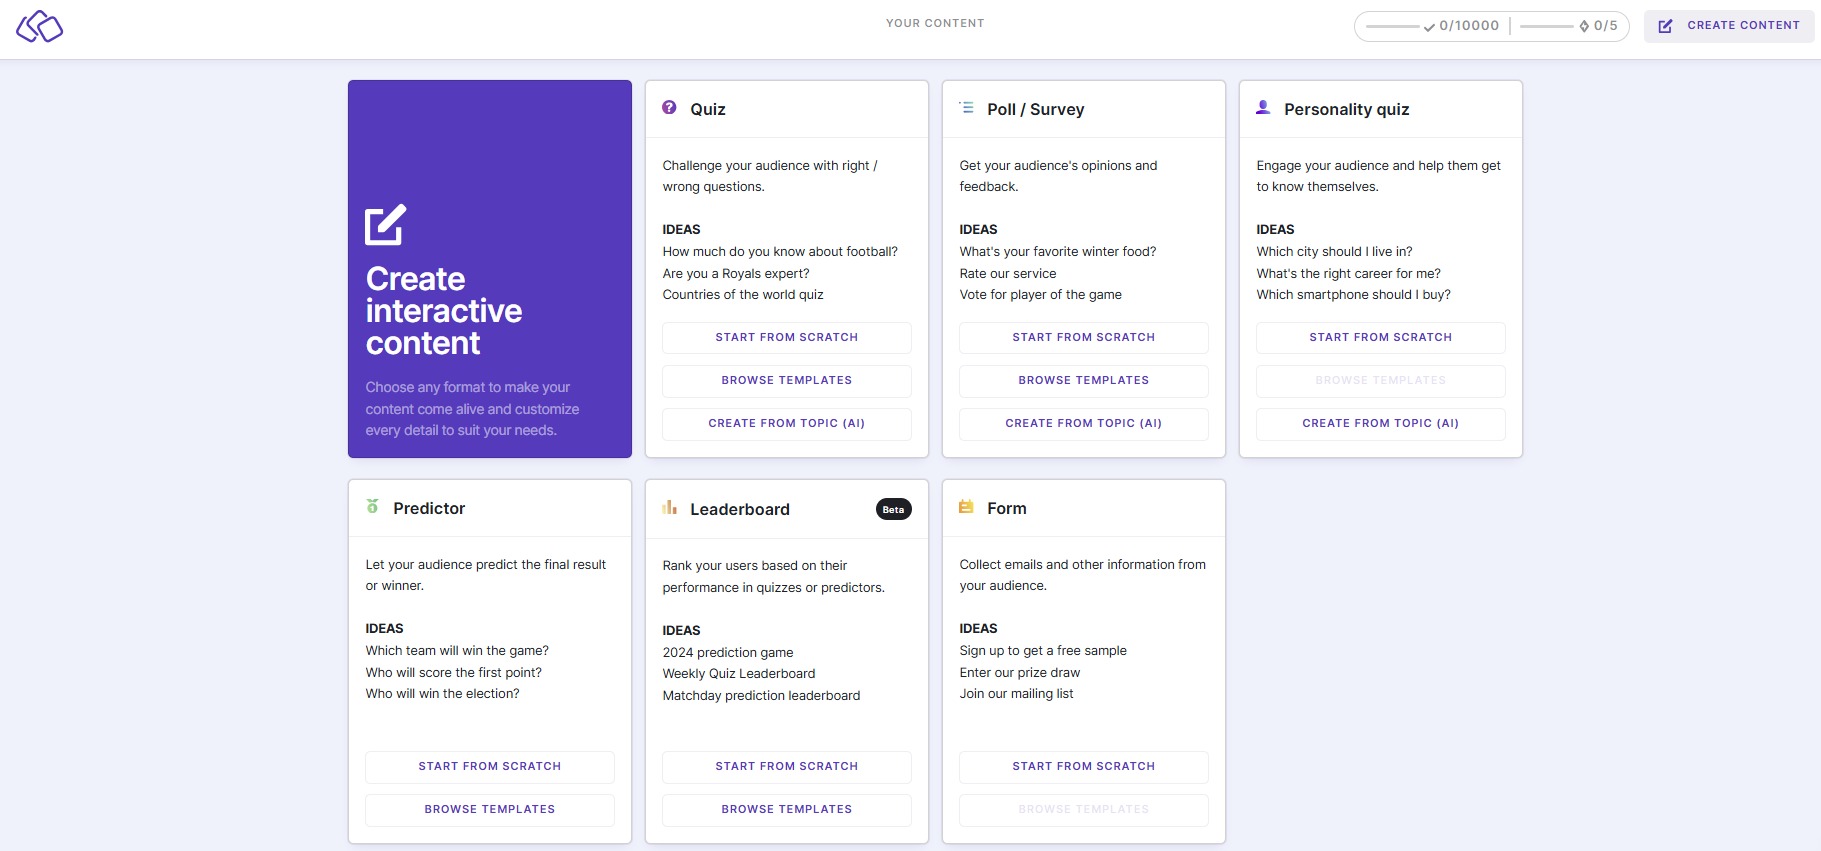
What’s Included in Quiz Maker?
Quiz Maker allows you to create a variety of content types to engage your audience and collect data for marketing purposes. It’s a block-based interactive content builder that lets users:
- Create quizzes, surveys, polls, personality tests and leaderboards with a visual editor that requires no coding
- Generate leads with in-quiz forms
- Embed content on the web and in apps
- Securely collect and store user data
- Create out-of-the-box sweepstakes and competitions
With a paid subscription, you can choose from 6 different content formats that can be combined with 32 different mix-and-match blocks to create the content you want to share and embed for your audience.
Your first port of call on the app is the home screen from which you can choose your content format to begin—your running totals for user completions and AI credits used can be seen at the top-right of this page.
Quizzes
To start creating a quiz, you can start from scratch, browse a range of available templates or ask AI to help you based on a topic of your choice—the app will present you with a few ideas in the white box above the buttons.
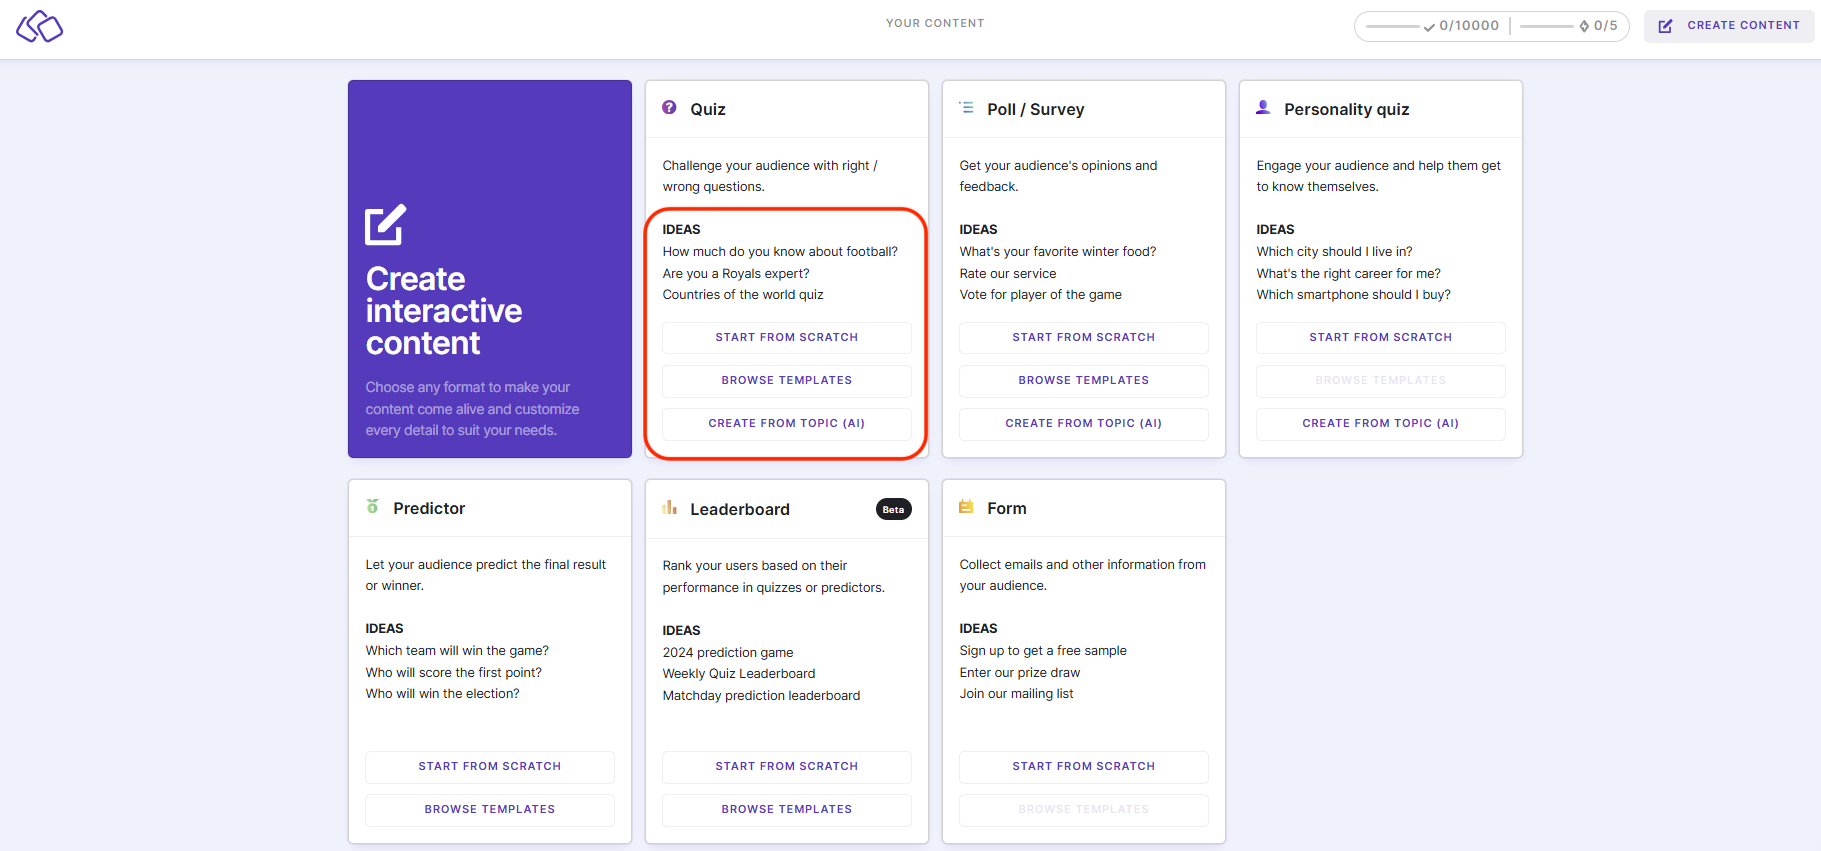
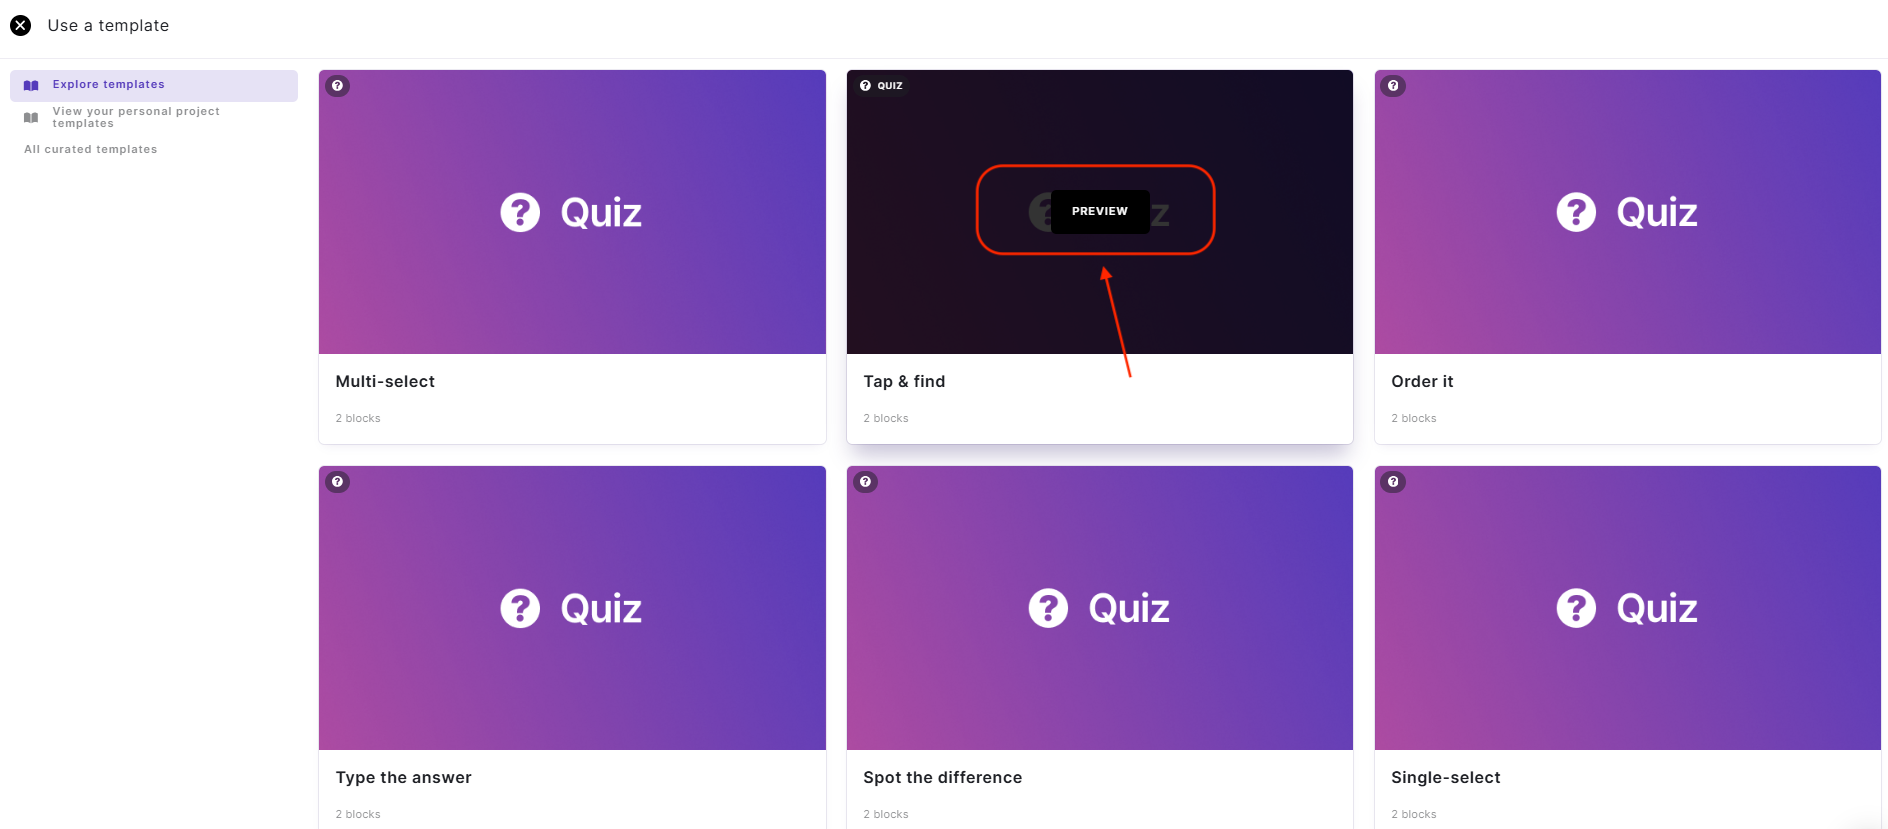
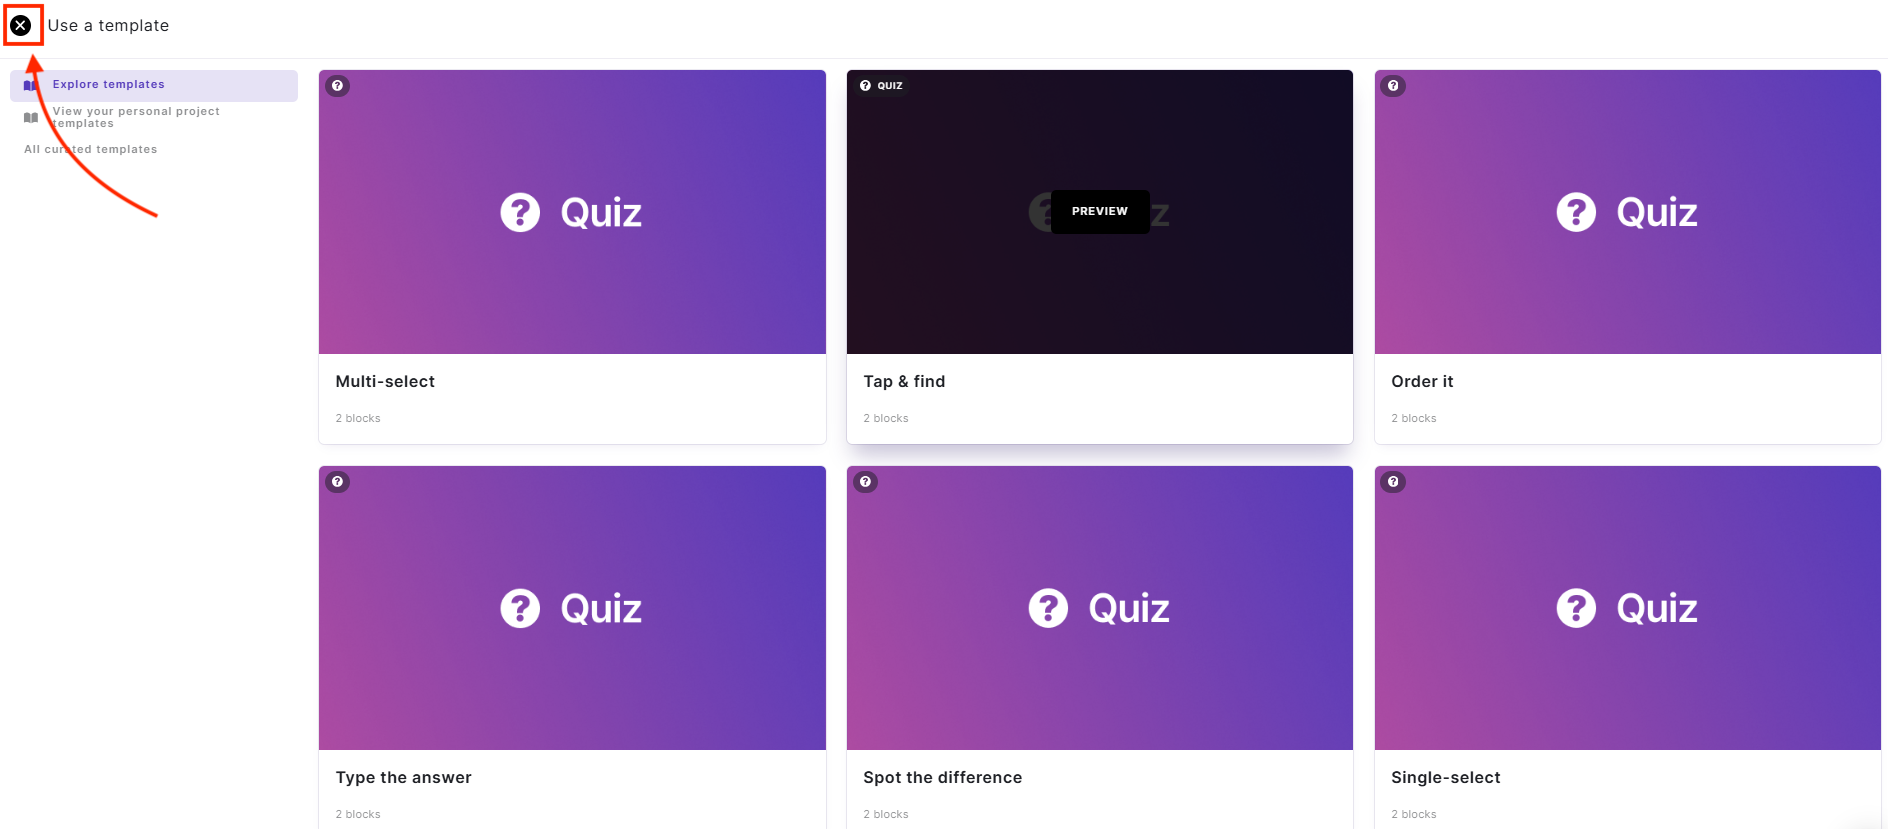
Click ‘Browse Templates’ to start exploring the possibilities for your quiz, including Multi-Select, Type the Answer and Spot the Difference. You can hover over any of the options and click ‘Preview’ to see it in action.
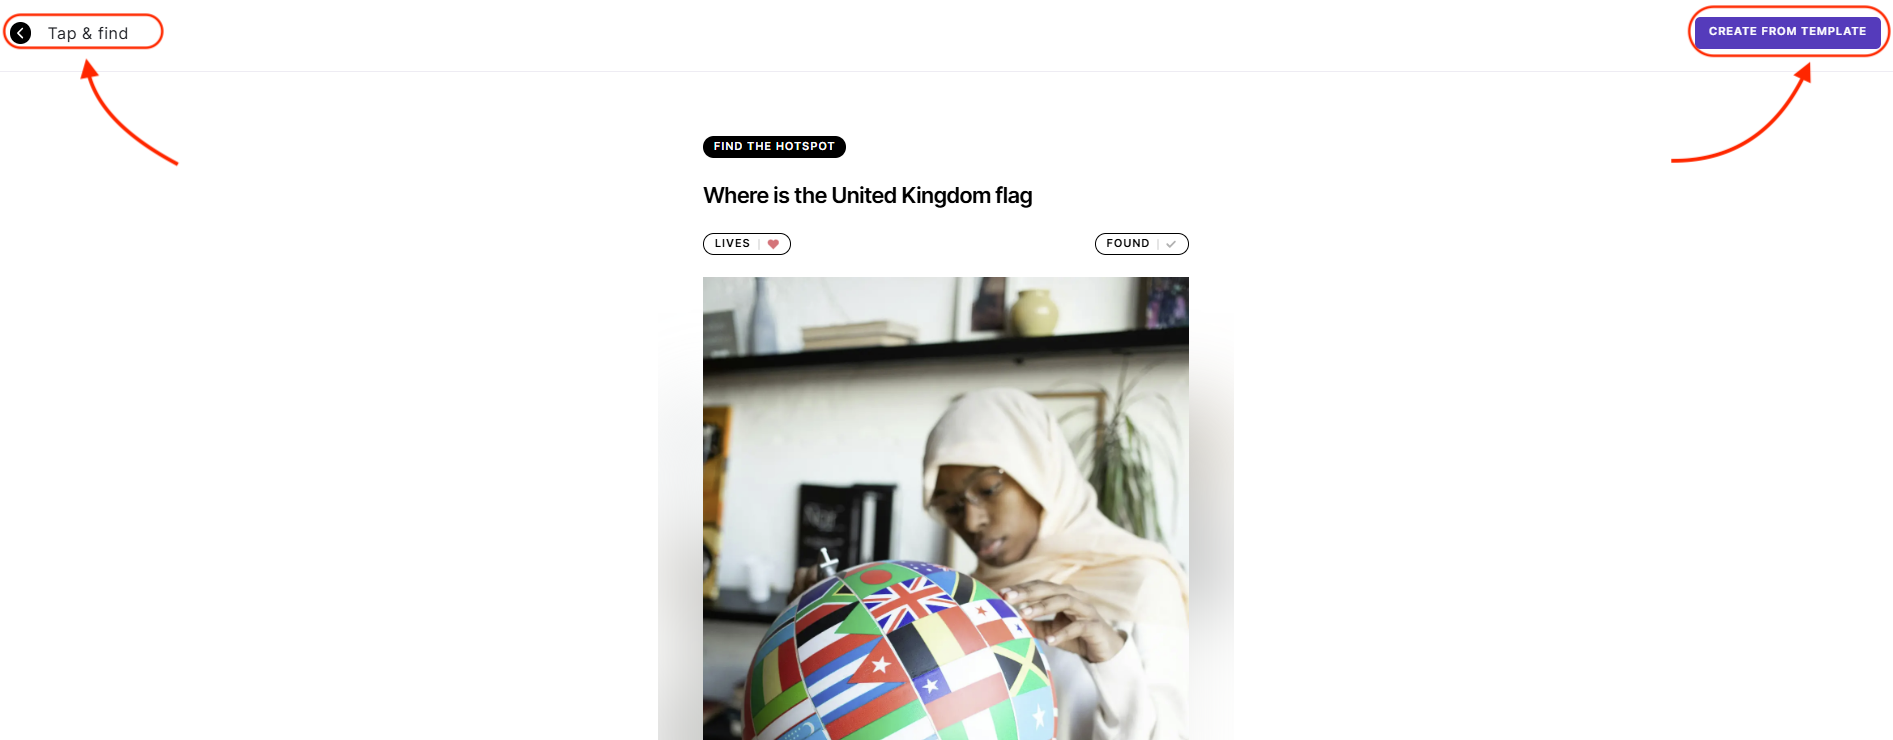
Use the preview to test out the template for your quiz and select ‘Create from Template’ at the top-right if you want to continue with it and input your own content, or click the back arrow at the top-left if you want to return to other templates and choose another one.
If you don’t want to use a template, you can use the ‘x’ at the top-left to return to the home screen.
Select ‘Create from Topic (AI)’ to start creating with the help of AI—this method will deduct an AI credit from your balance for each creation. You can see your remaining credits at the top-right of this pop-up box.
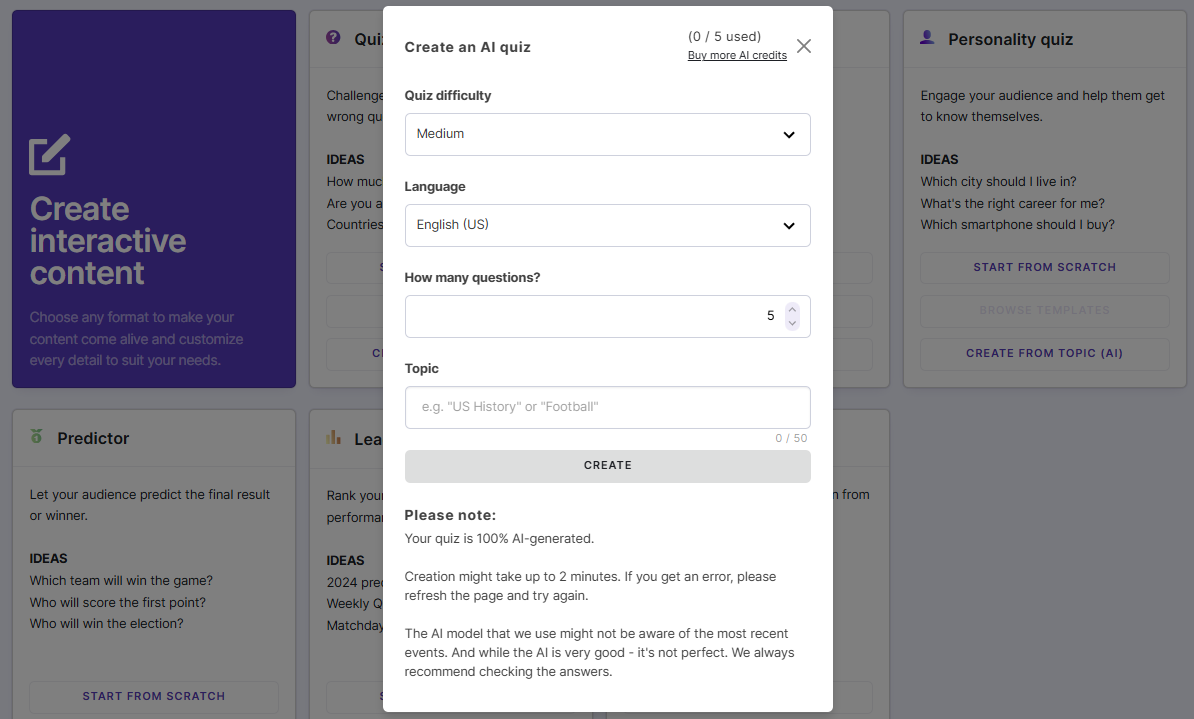
Here, you can choose the difficulty (Easy, Medium or Hard), language, number of questions (up to 10) for your quiz before giving AI a prompt for the topic, such as “Football.”
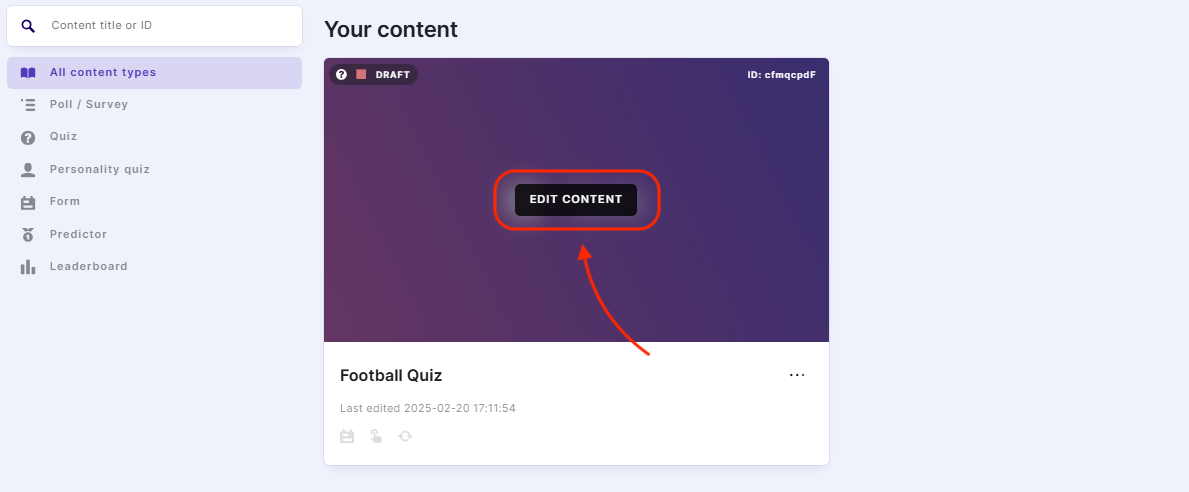
Click ‘Create’ once you’re done and your quiz will be generated—this can take 1-2 minutes and your quiz will appear in the ‘Your Content’ section once it’s ready. You can navigate to it via the ‘Your Content’ button in the header and use the menu on the left to filter through your content to find it.
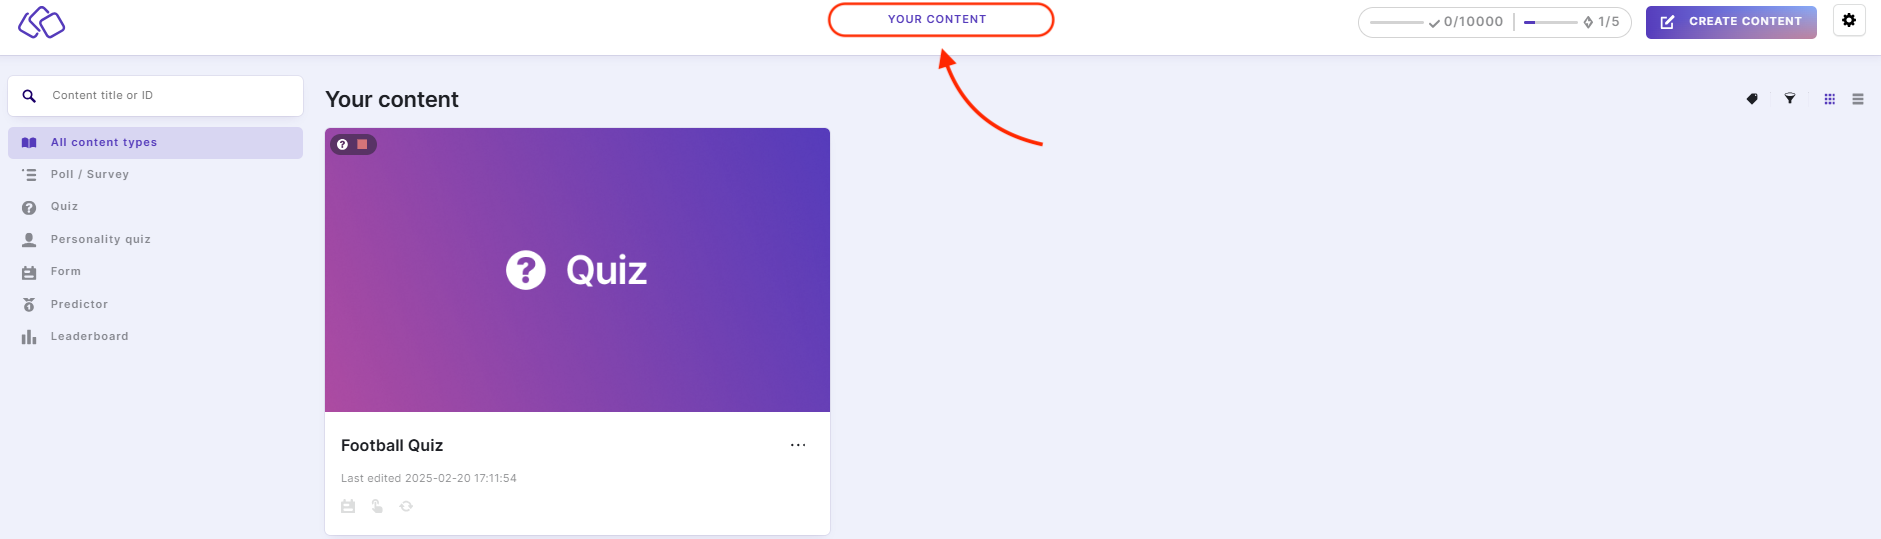
Hover over the purple box to reveal the ‘Edit Content’ button and click it to start inputting your own material. You’ll also see the ID number for each piece of content at the top-right of this box, which you can use in the search bar at the top-left of the ‘Your Content’ section when you need to find it later—this is particularly useful when you have built up a catalog of content as it allows you to jump straight to it without having to scroll through everything you’ve created.
The three dots in the white area bring up a few options for each quiz, too, including heading straight to publishing if it’s ready, copying the format to apply to other quizzes and saving it as a template to access via the personal templates library.
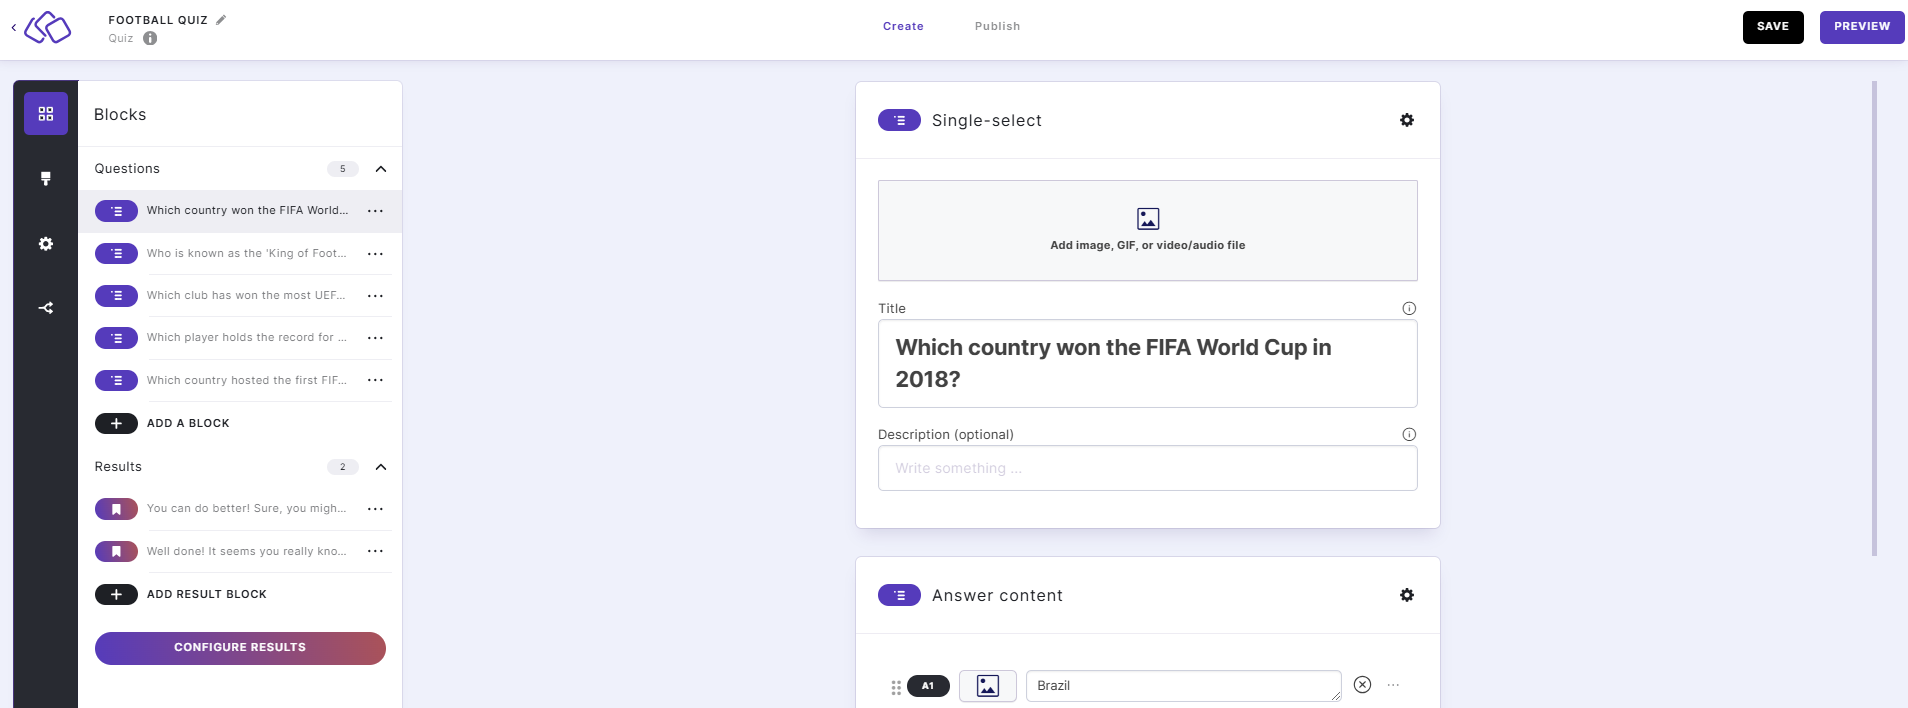
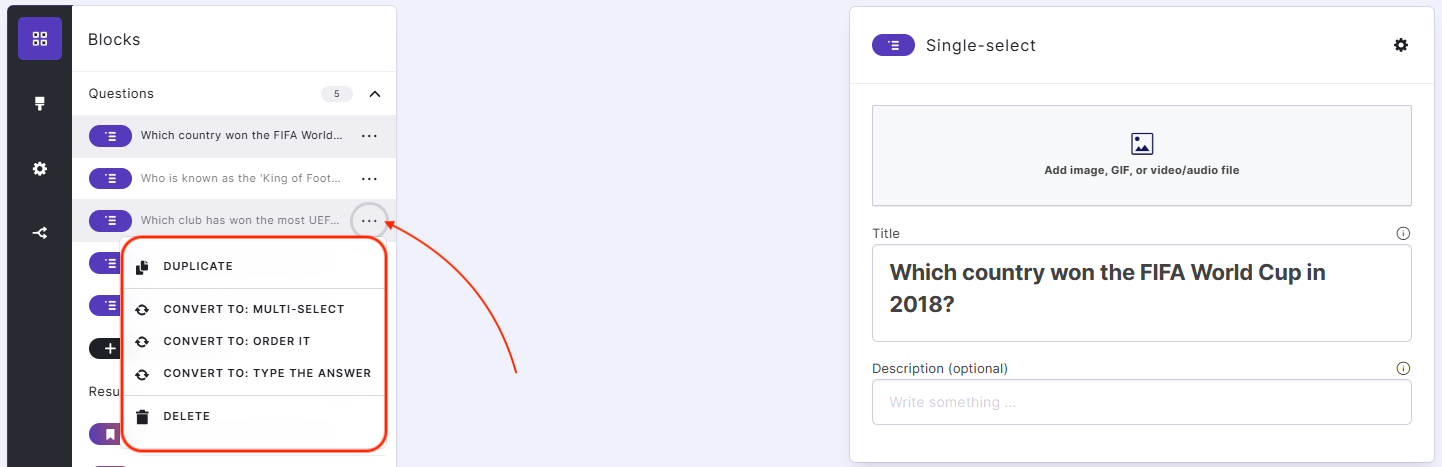
Click ‘Edit’ to head to the content editor, where you’ll see all the blocks the AI has populated your quiz with as a starting point.
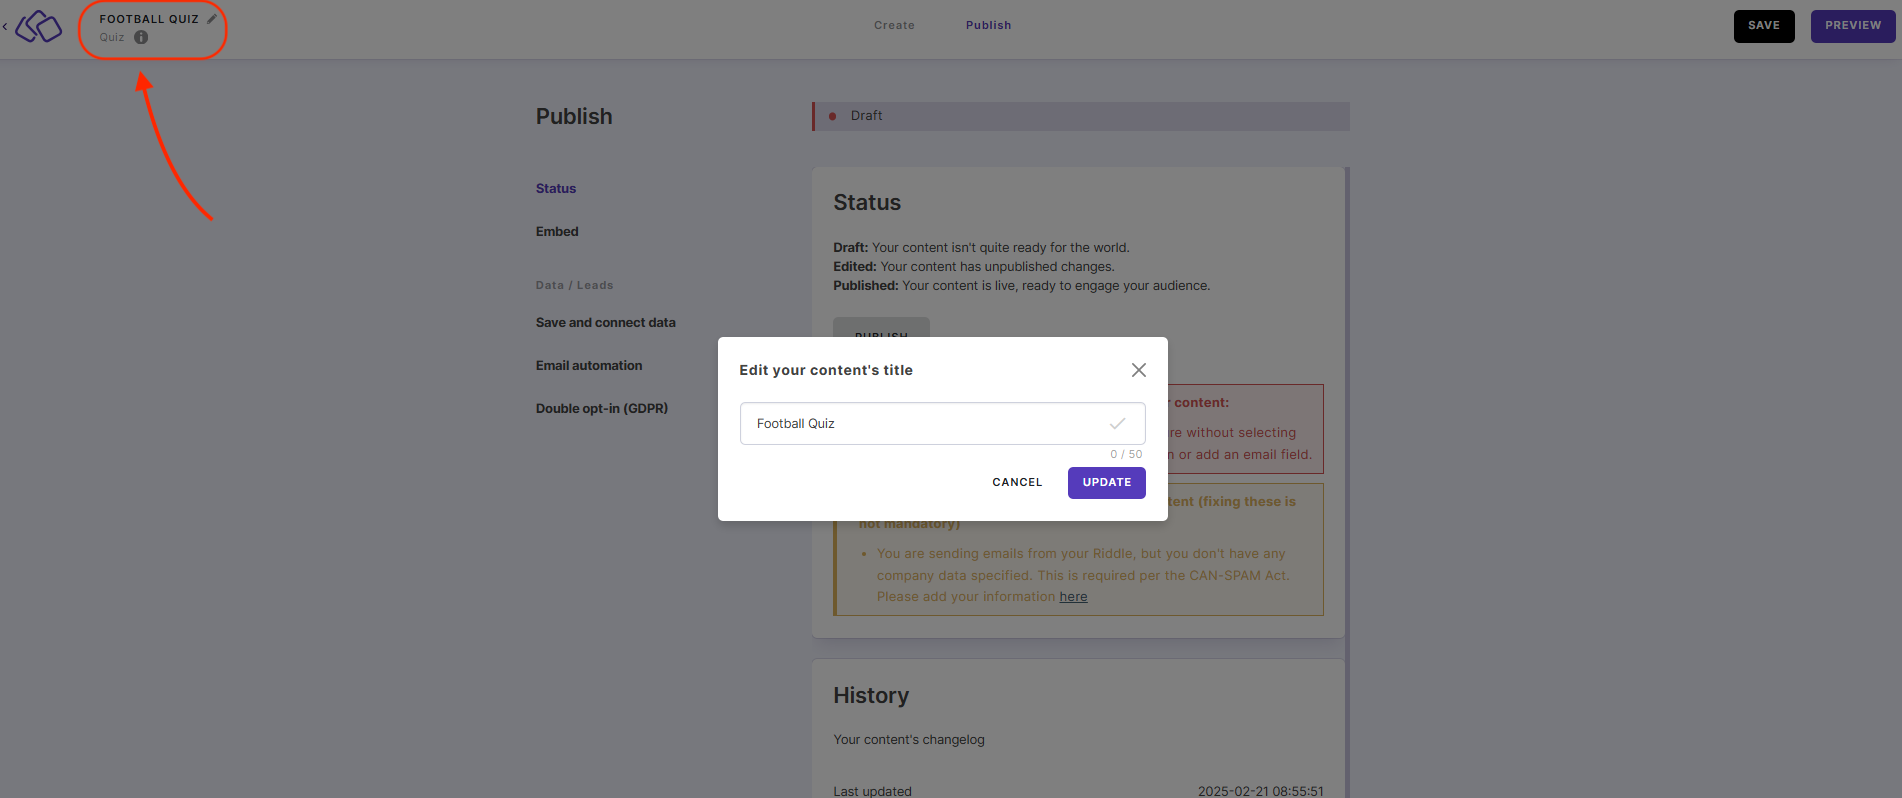
If you want to change the name of your quiz, you can do so easily by clicking the pencil icon at the top-left of the page.
You can navigate to any of the question or result blocks by clicking them in the left-hand menu and tweaking them directly in the editor, including adding images to each individual question.
Click the ‘image’ icon to reveal the pop-up box via which you can search for images, video and audio to add to your quiz—you can use Google Search, Pexels and Giphy or upload directly from your computer by clicking ‘Upload’ or dragging and dropping into the box.
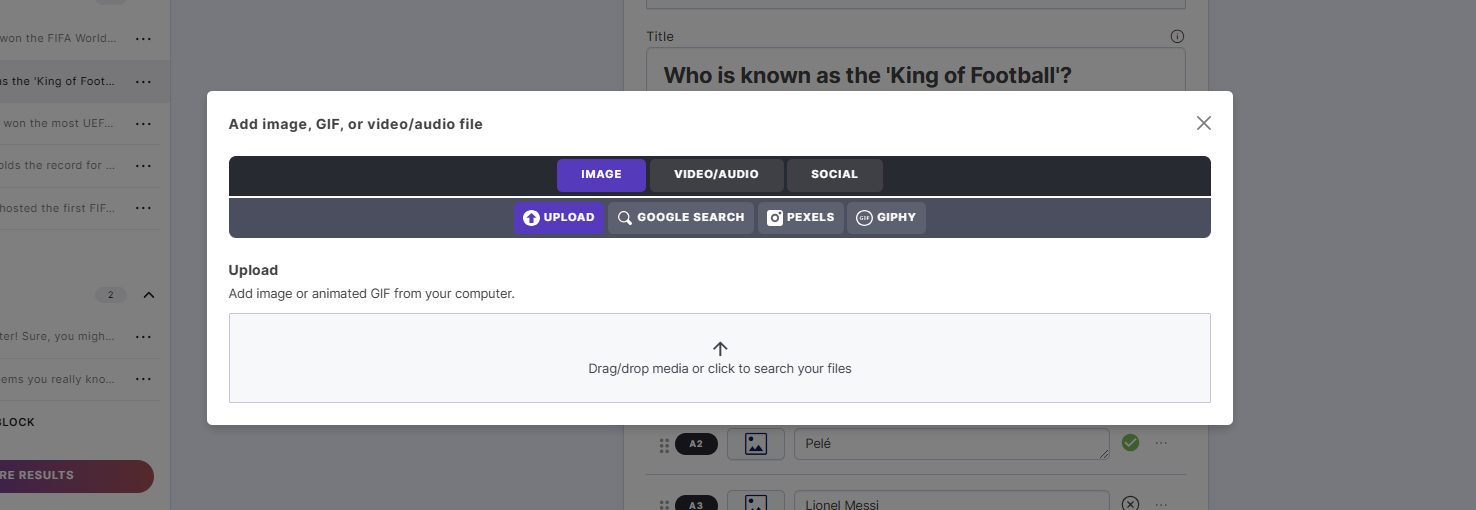
The Google Search function, for instance, brings back images directly from Google based on your keyword and you can click on the one you want to add it to your quiz. If you click back into the image once it’s been added, you can see attribution details, edit it to suit your requirements or delete it if you want to choose another one.

You can select the correct answer by clicking the ‘x’ button to the right of each box—it will turn into a green tick to indicate which answer is the correct one.
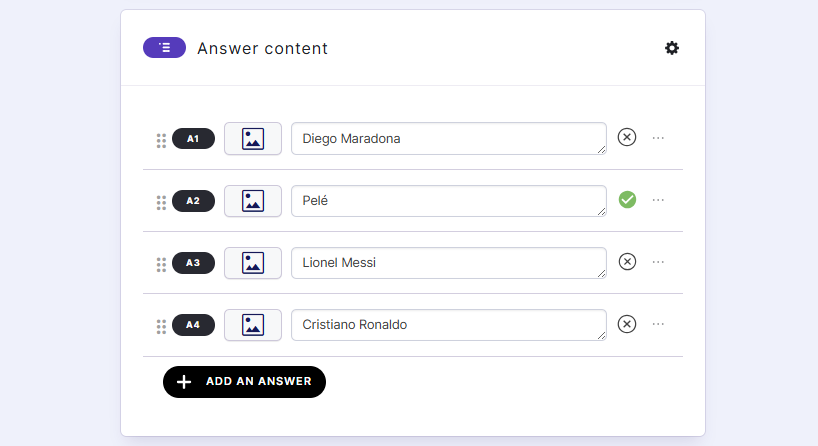
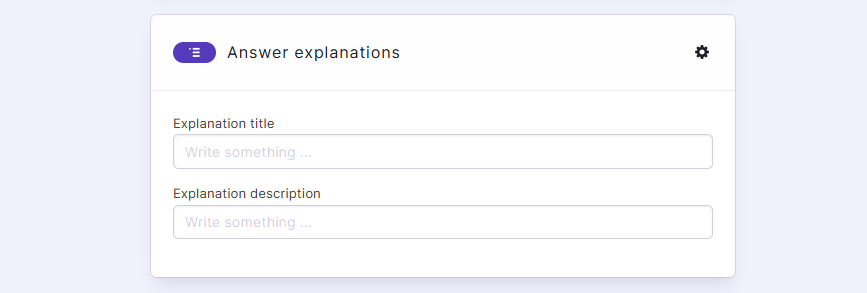
If you scroll down below the questions, you can also add explanations for each answer by typing in the boxes provided.
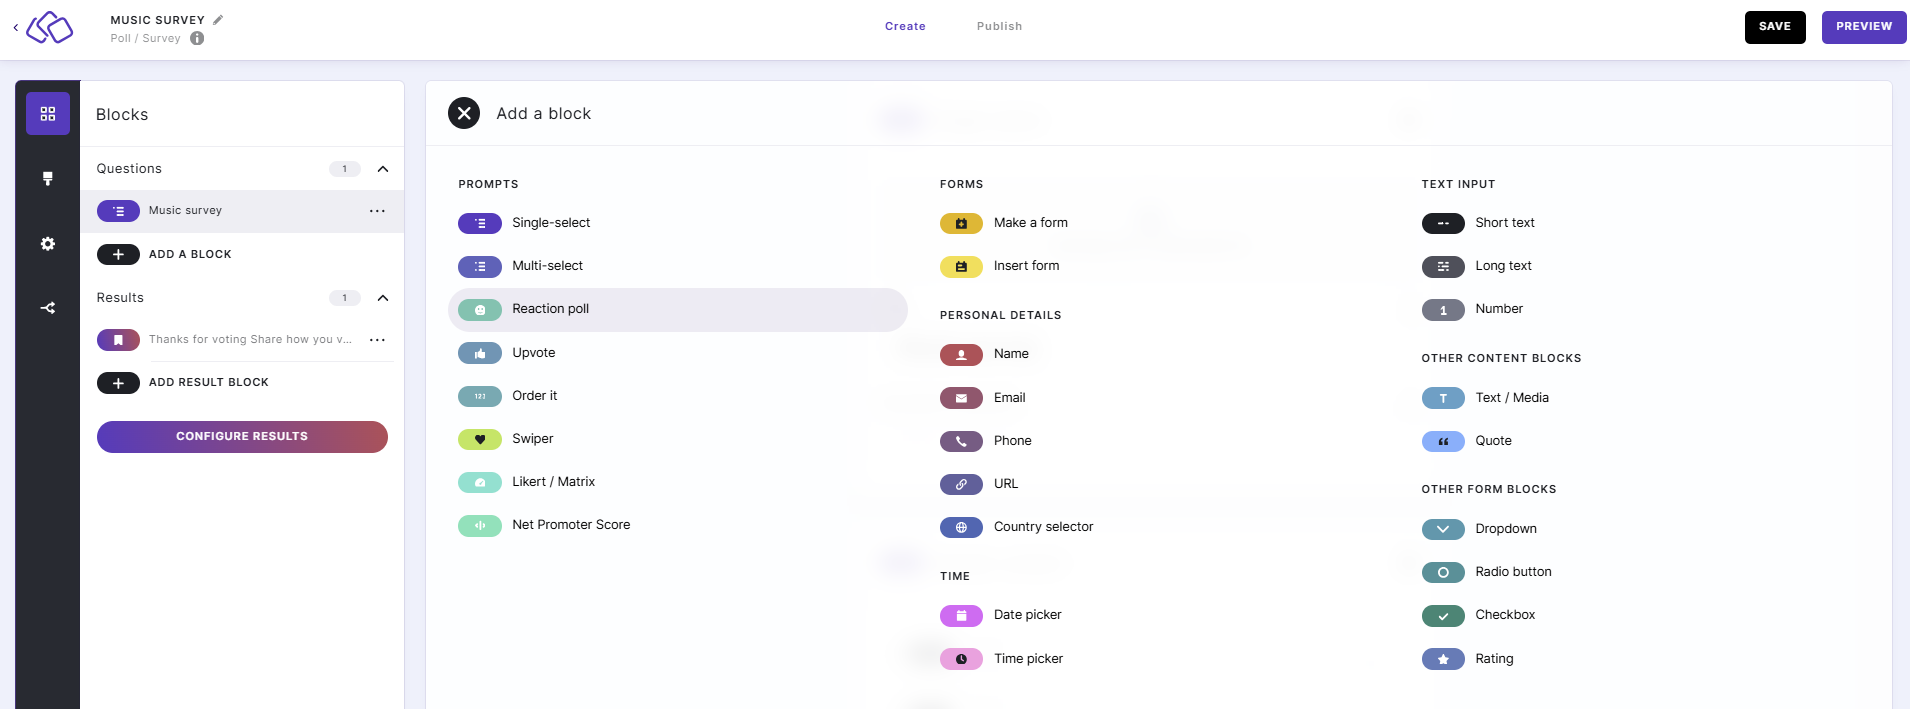
You have a number of options when it comes to adding blocks to your quiz—you can use the ‘Add Block’ buttons in the left-hand menu to explore them. Your question block options are organized into the following categories to help you tailor the quiz to your needs: Prompts, Forms, Personal Details, Time, Text Input, Other Content Blocks and Other Form Blocks.

You can duplicate or delete any existing blocks in the list or convert them to a different format using the three-dot button.
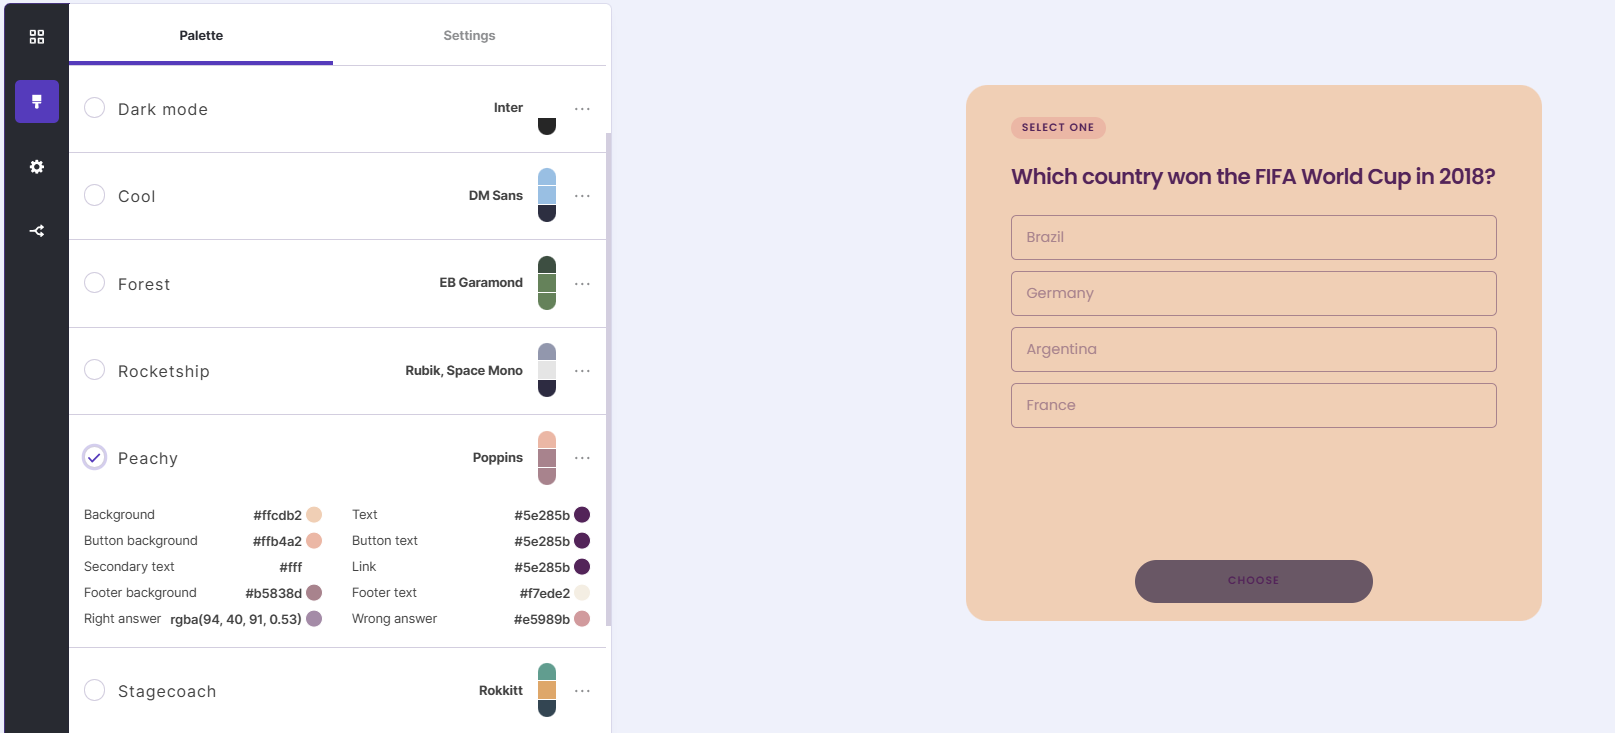
The ‘Palette’ icon in the left-hand menu takes you to the design settings where you can match your quiz theme to your brand. When you select a palette, your quiz’s appearance will be automatically saved.
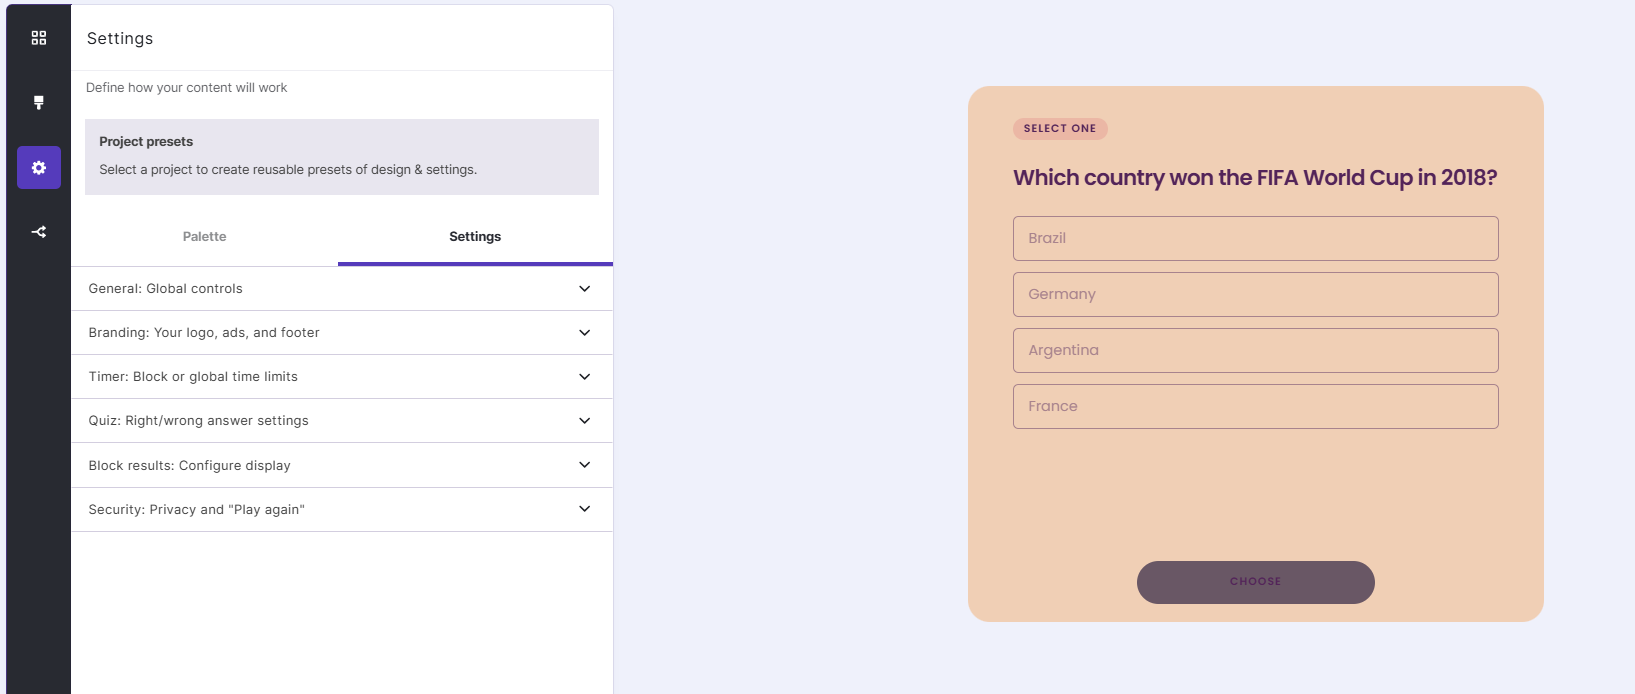
Click ‘Settings’ here to edit the way your quiz will work, including global controls, right and wrong answer settings and privacy and security.
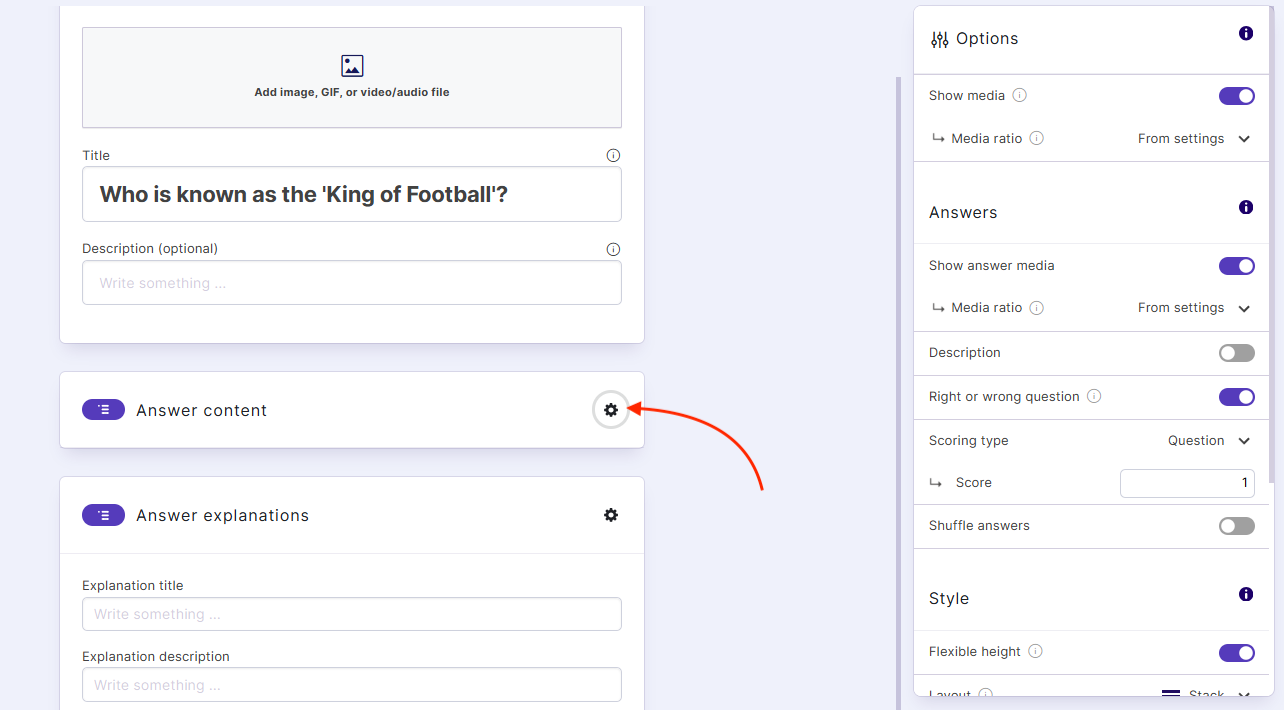
To open the advanced options at any time, simply click the cog icon at the top-right of any question or answer box and a new menu will appear on the right of your screen. You can use this to change things like style and scoring per question if, say, you want to award users 5 points instead of 1 for every correct answer.
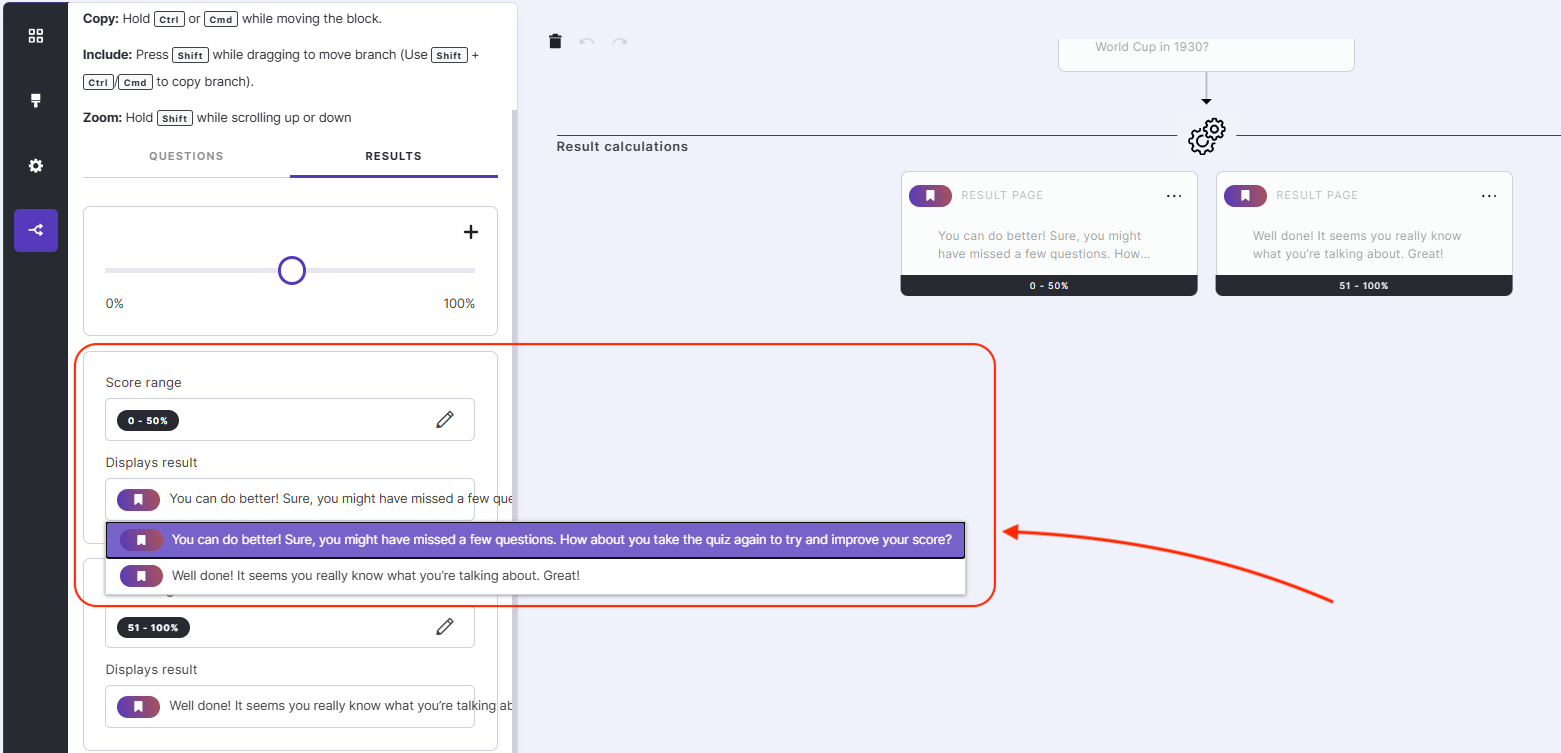
When you’re happy with the content of your quiz, click ‘Configure Results’ to head to the ‘Branching Logic & Results’ section, where you’ll find instructions for finalizing it. This allows you to apply ranges to the final scores and compose messages to display to the user upon completion—for example, if they answer under 50% of the questions correctly, you might say “You can do better!” on the final page.
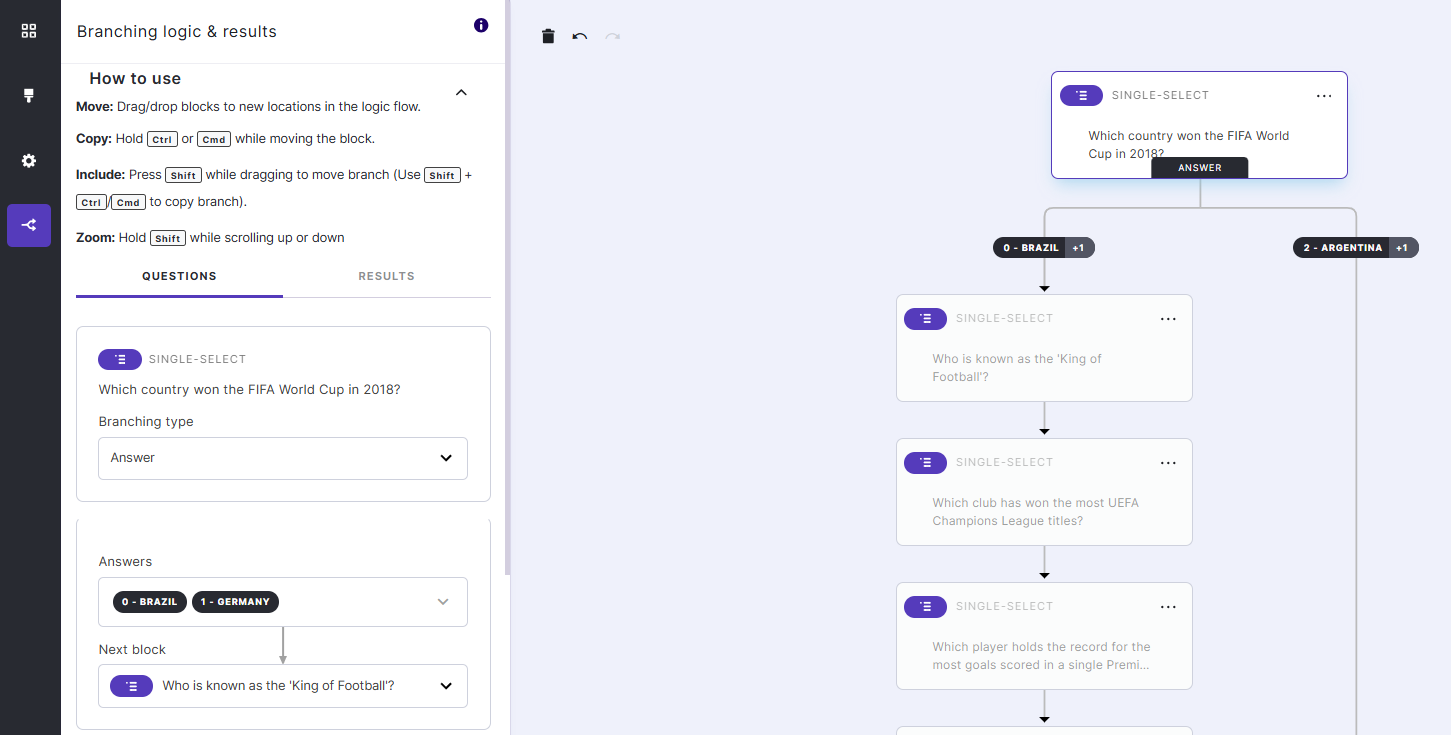
Click on the ‘Questions’ header to navigate your way through each block and choose a branching type from Linear, Answer, Block Score and Total Score. These options allow you to choose the path the user will take through your quiz depending on their answers—Linear will be a simple question-by-question quiz, while Answer will branch off and present different questions along the way.
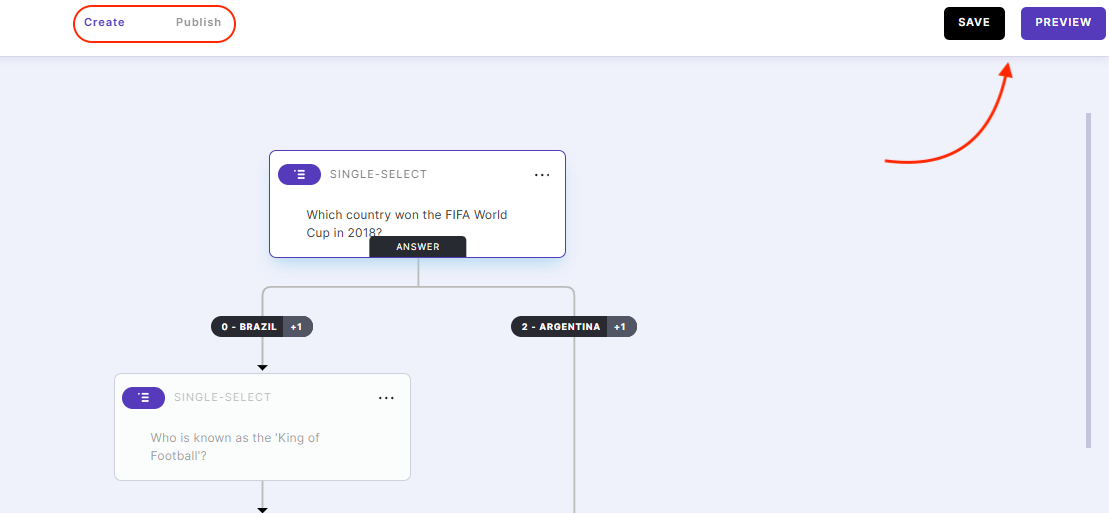
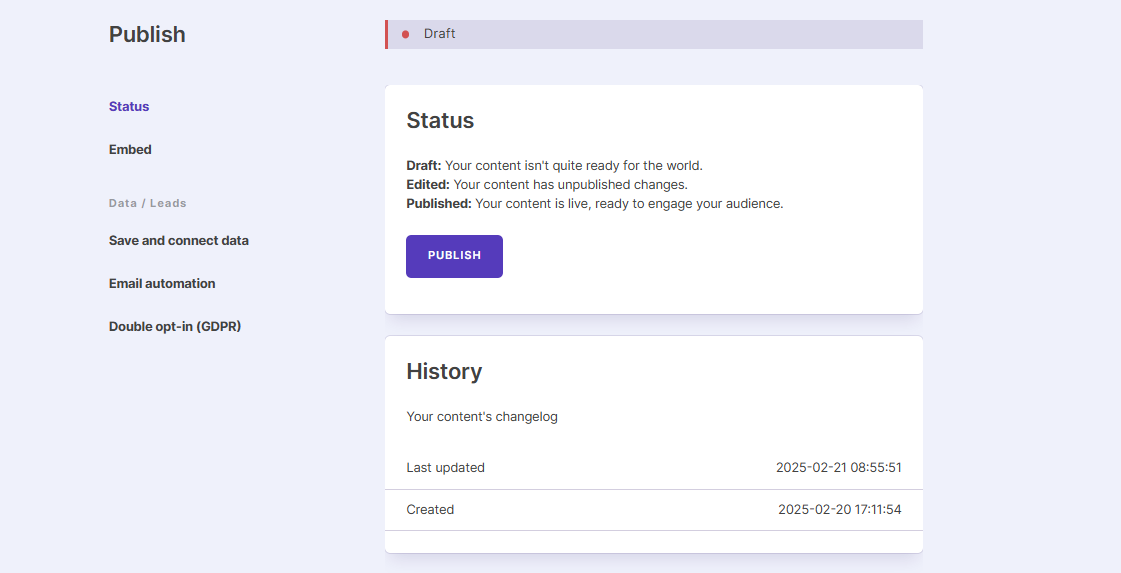
When you’re happy with the flow of your quiz, you can preview it using the purple button at the top-right of your screen and publish it using the ‘Publish’ button in the center of the header.
The preview will allow you to view and play the quiz as it will appear on desktop or mobile, while the ‘Publish’ button will give you options to publish it to a landing page or get the code to be able to embed it elsewhere.
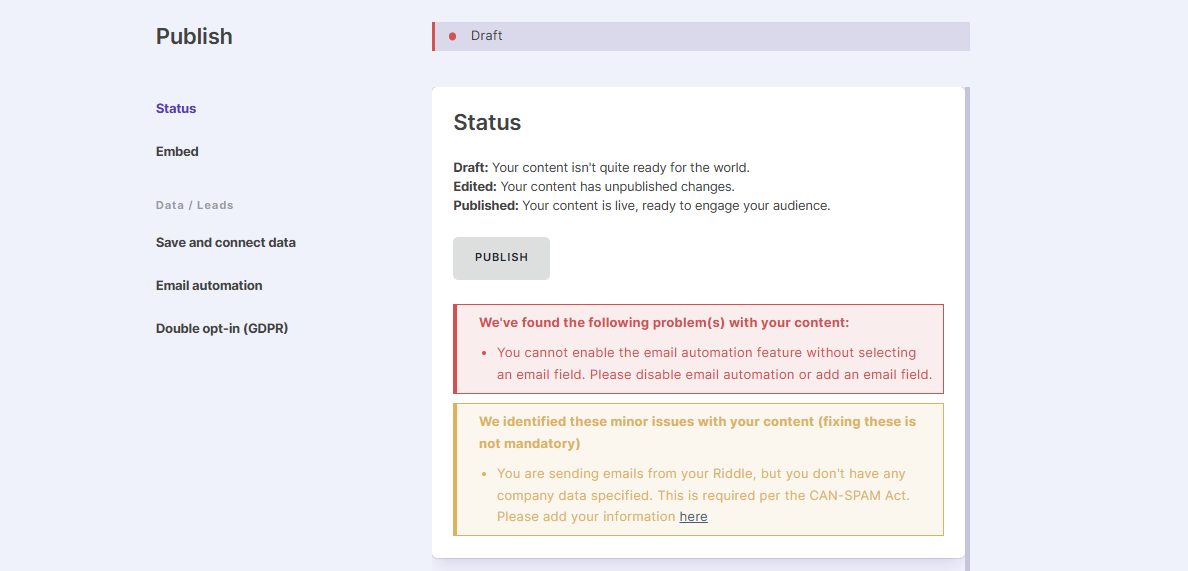
If there is a problem with the status of your quiz—for example, if you have selected ‘email automation’ to email users upon completion, but you haven’t included an email field as a block in your quiz—you will see a warning box on this page with a note about what you need to fix. The warning box will be red if it concerns a critical part of the quiz functionality and amber if it’s a minor issue and fixing it isn’t compulsory.
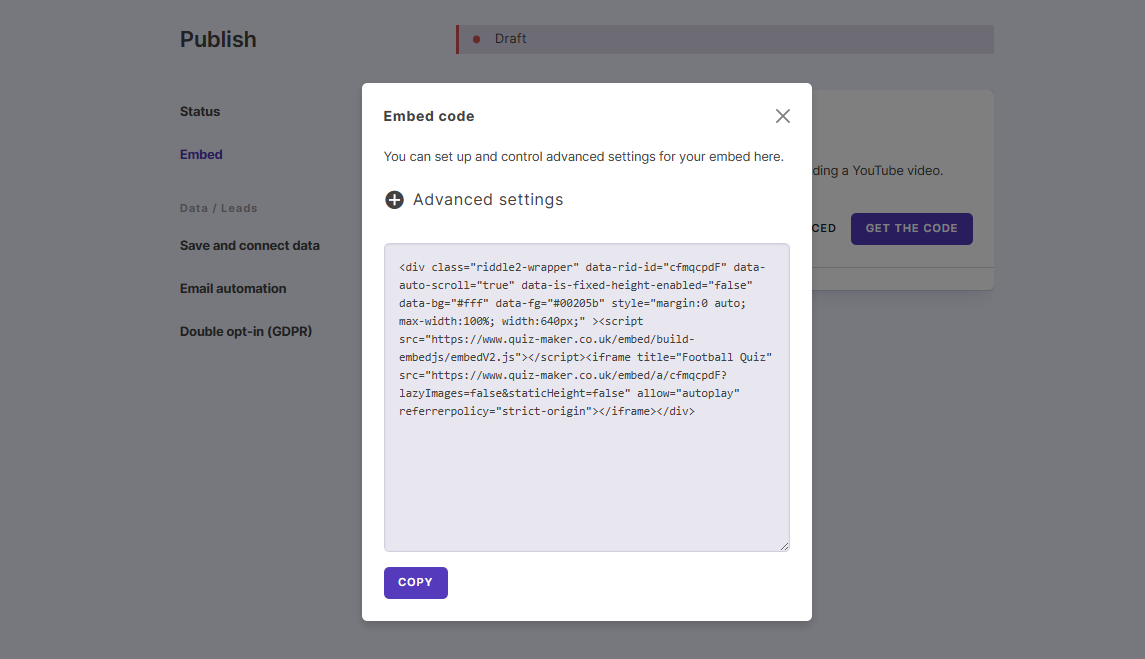
Click ‘Embed’ and then ‘Get the Code’ to reveal the code for you to copy and use or share with your team.
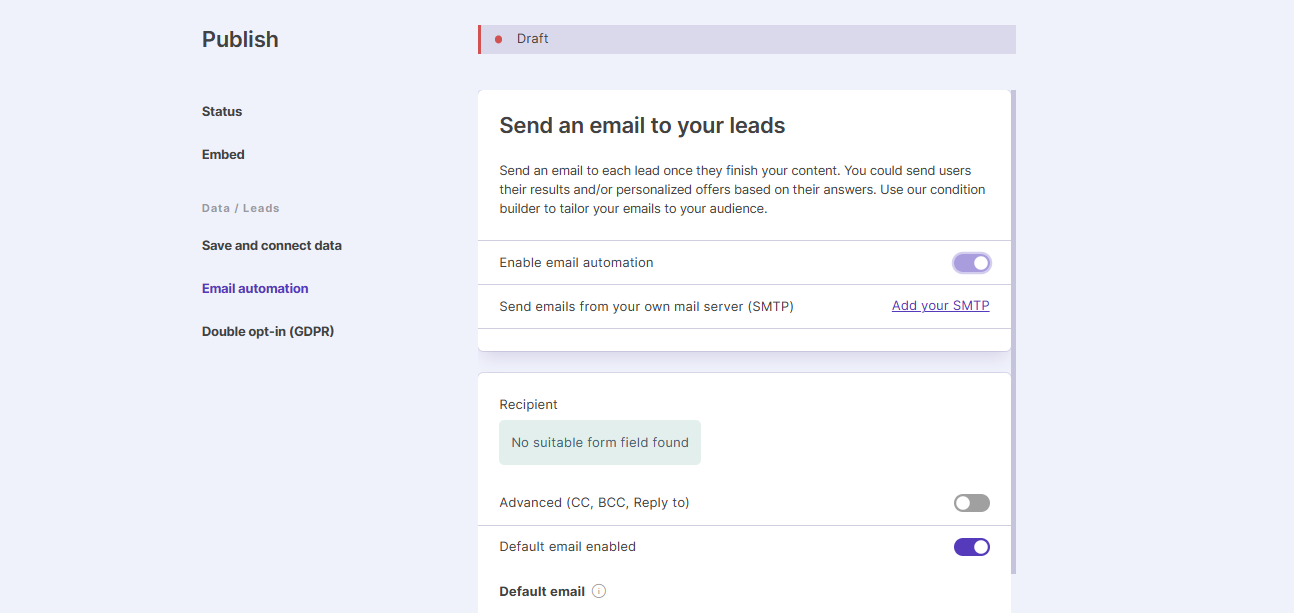
You can also set your Data/Leads preferences here, such as saving leads to a spreadsheet or emailing them immediately upon completion of your quiz. You’ll need to have added a data collection form to your quiz for this to work—this can be done via the ‘Add Block’ button in the left-hand menu as you are building your quiz. Click ‘Create’ in the header to go back to the editor at any time.
Polls and Surveys
You can use Quiz Maker to create polls and surveys to gather data from your audience. This section uses the same content editor as outlined in the ‘Quiz’ section above and you have a range of block options from which to build your content. Let’s take ‘Reaction Poll’ as an example.
A poll block will appear in your editor for you to populate with content—you can add an image, GIF, video or audio file to use as a media header for your poll and add an optional title and description if you wish.
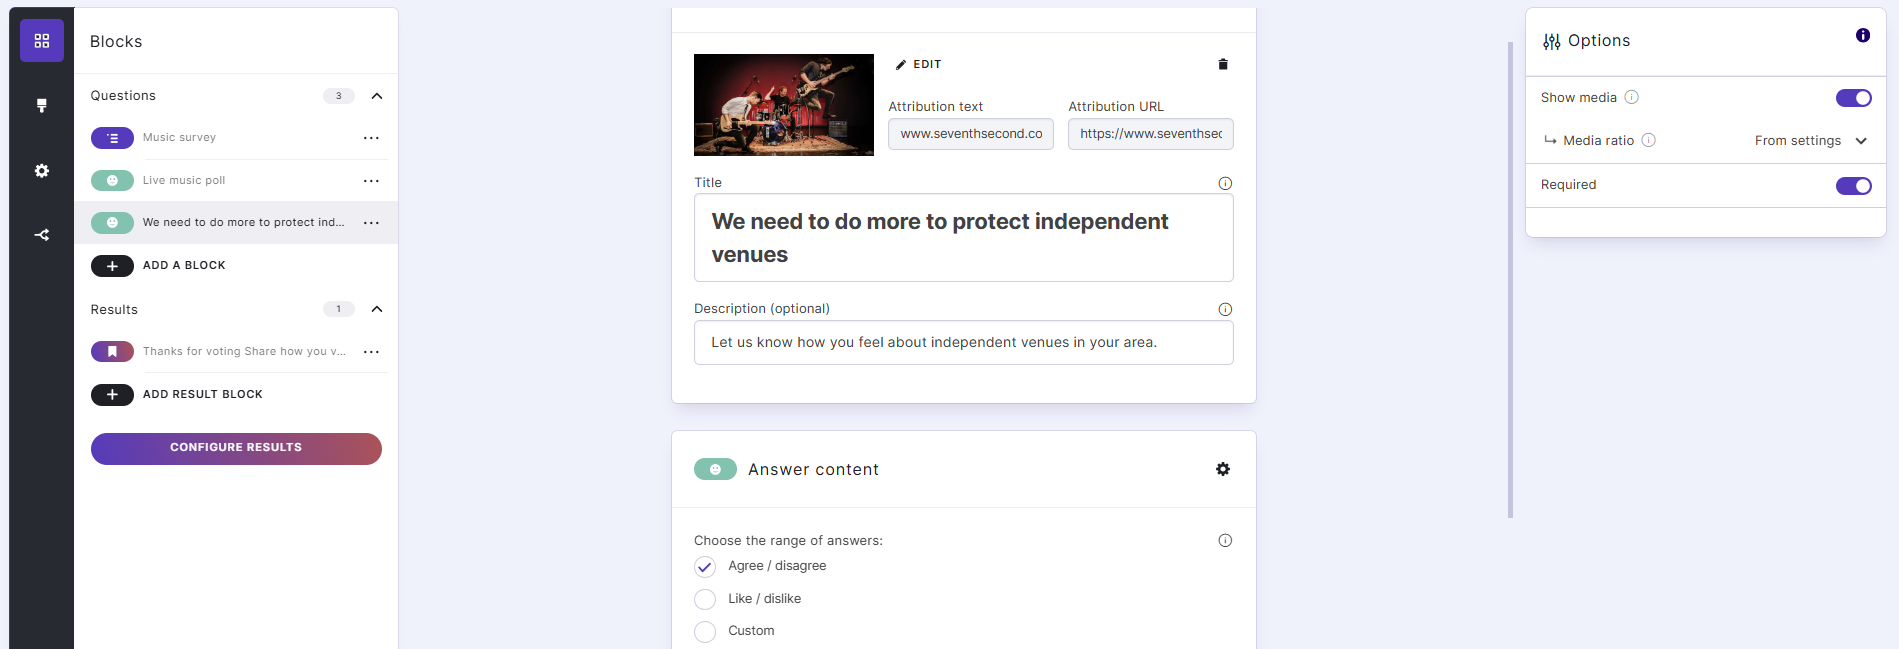
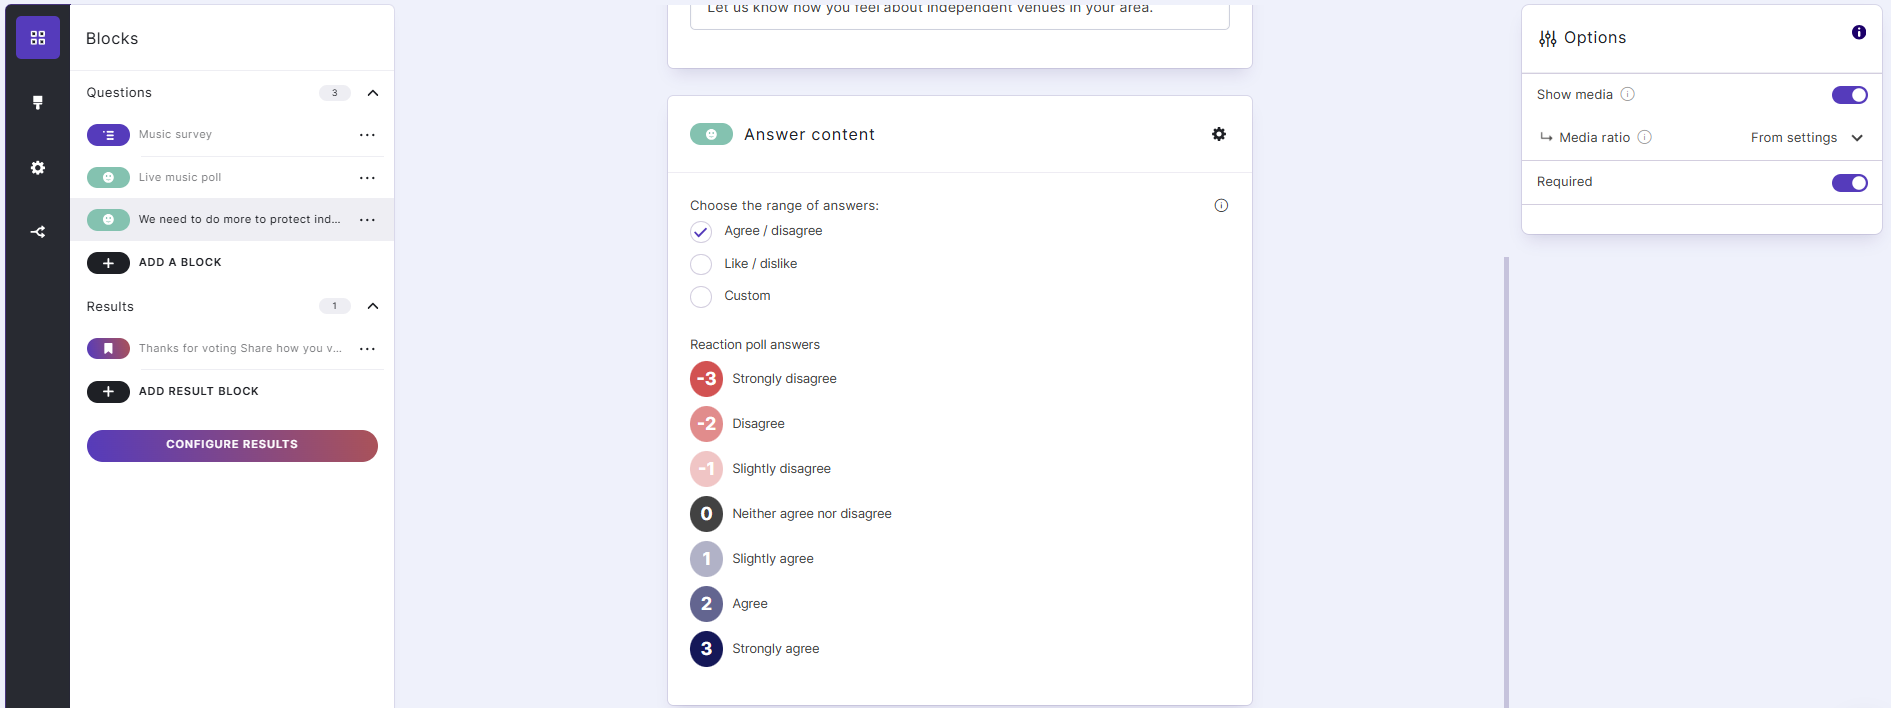
Scroll down to edit the poll reaction options—you can add custom values if you like.
Head to ‘Branching Logic & Results’ to change the block that appears once your users have voted. Double-click on the ‘Result Page’ to open the drag-and-drop editor here—you can change the text and edit the position of any element by clicking and dragging either the element itself or the six-dot icon above it.
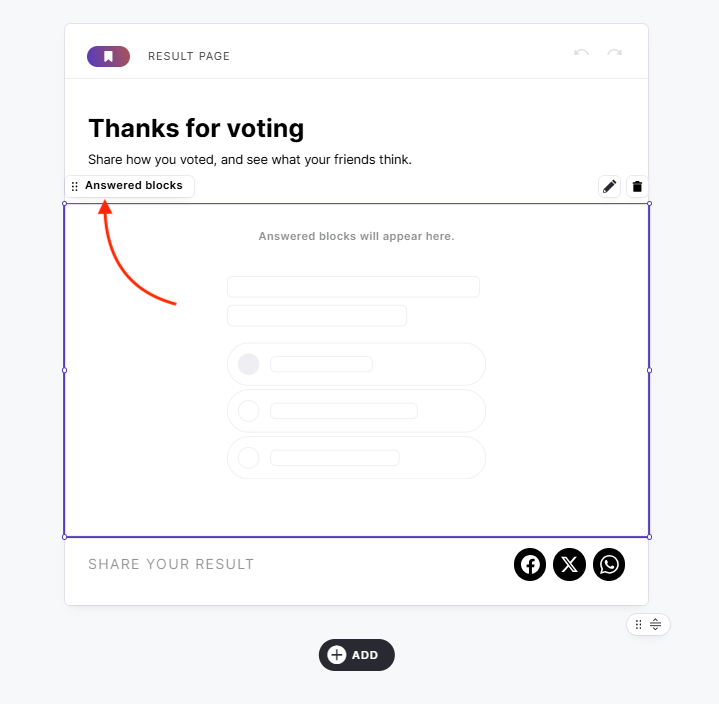
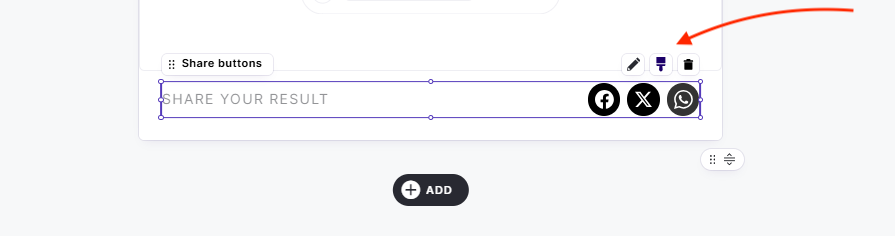
If you want to edit the settings of any block, such as the social buttons, simply click to reveal the options via the pencil, brush or trash icons. Any changes you make here will be automatically saved.
You can see a preview at any time by clicking the purple button at the top-right of your screen.
When you are ready to go live, click ‘Publish’ in the header to go to the status screen, where you can check for any errors first.

Personality Quizzes
Quiz Maker features a personality quiz creator that uses the same content editor as the one described above. There are currently no templates available, but you can design from scratch or use AI to help you create a topic.
If you start from scratch, you’ll need to start by filling out the blocks for each personality and attribute, which you can do via the ‘Label’ box.
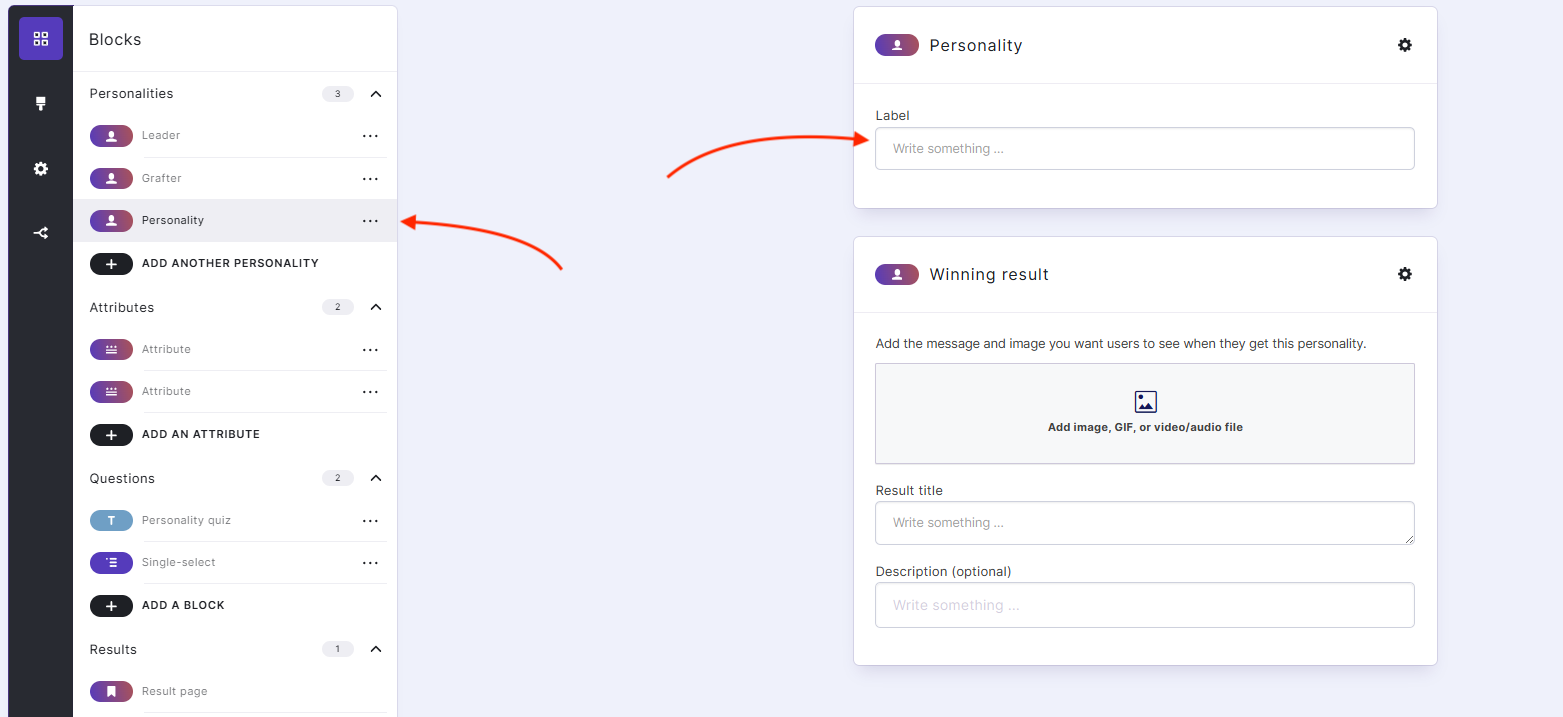
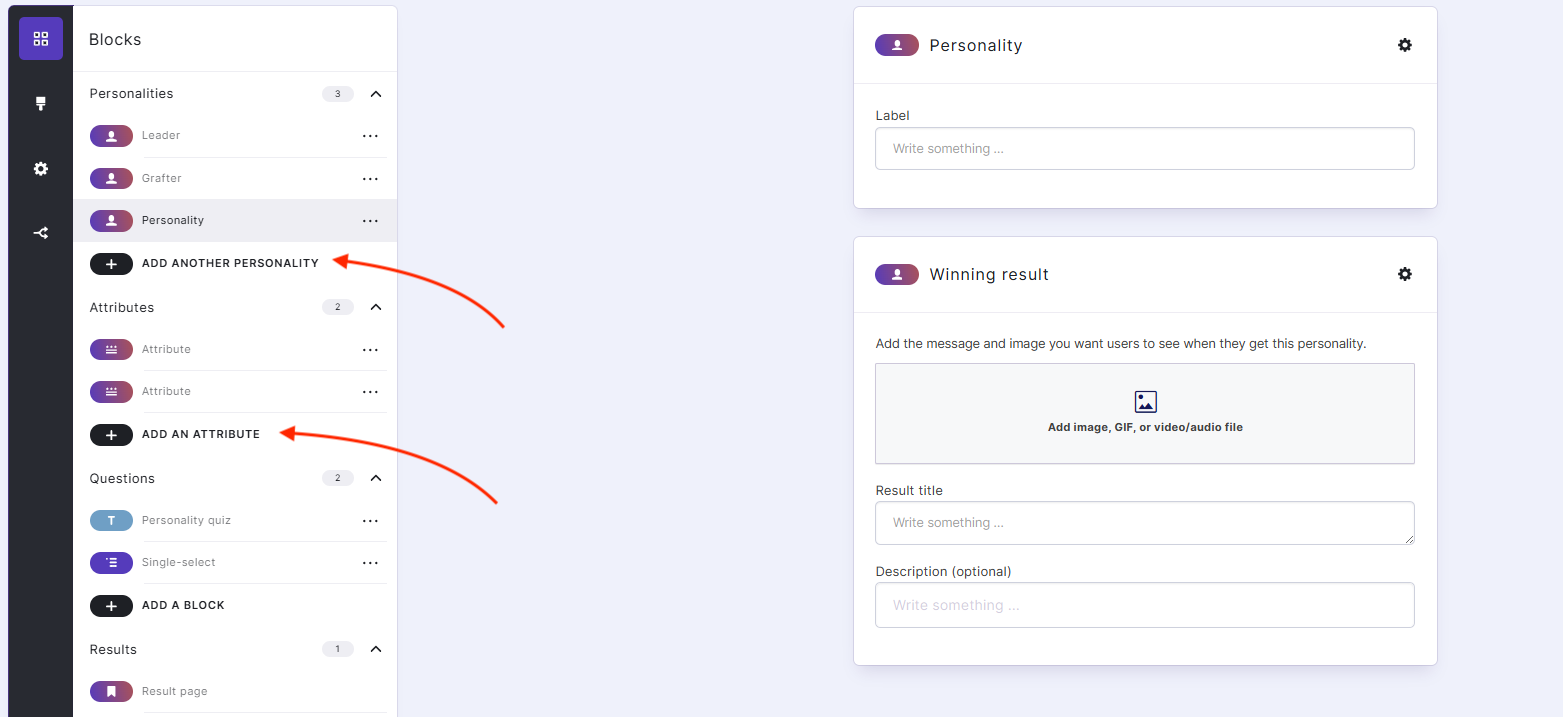
Build more personalities and attributes into your quiz by clicking the respective ‘Add’ buttons in the left-hand menu.
Next up, you can start adding the questions that will guide your users to the preset personality types—choose an image and type your question and description into the boxes provided. You can format the text using the pop-up options above each text box.
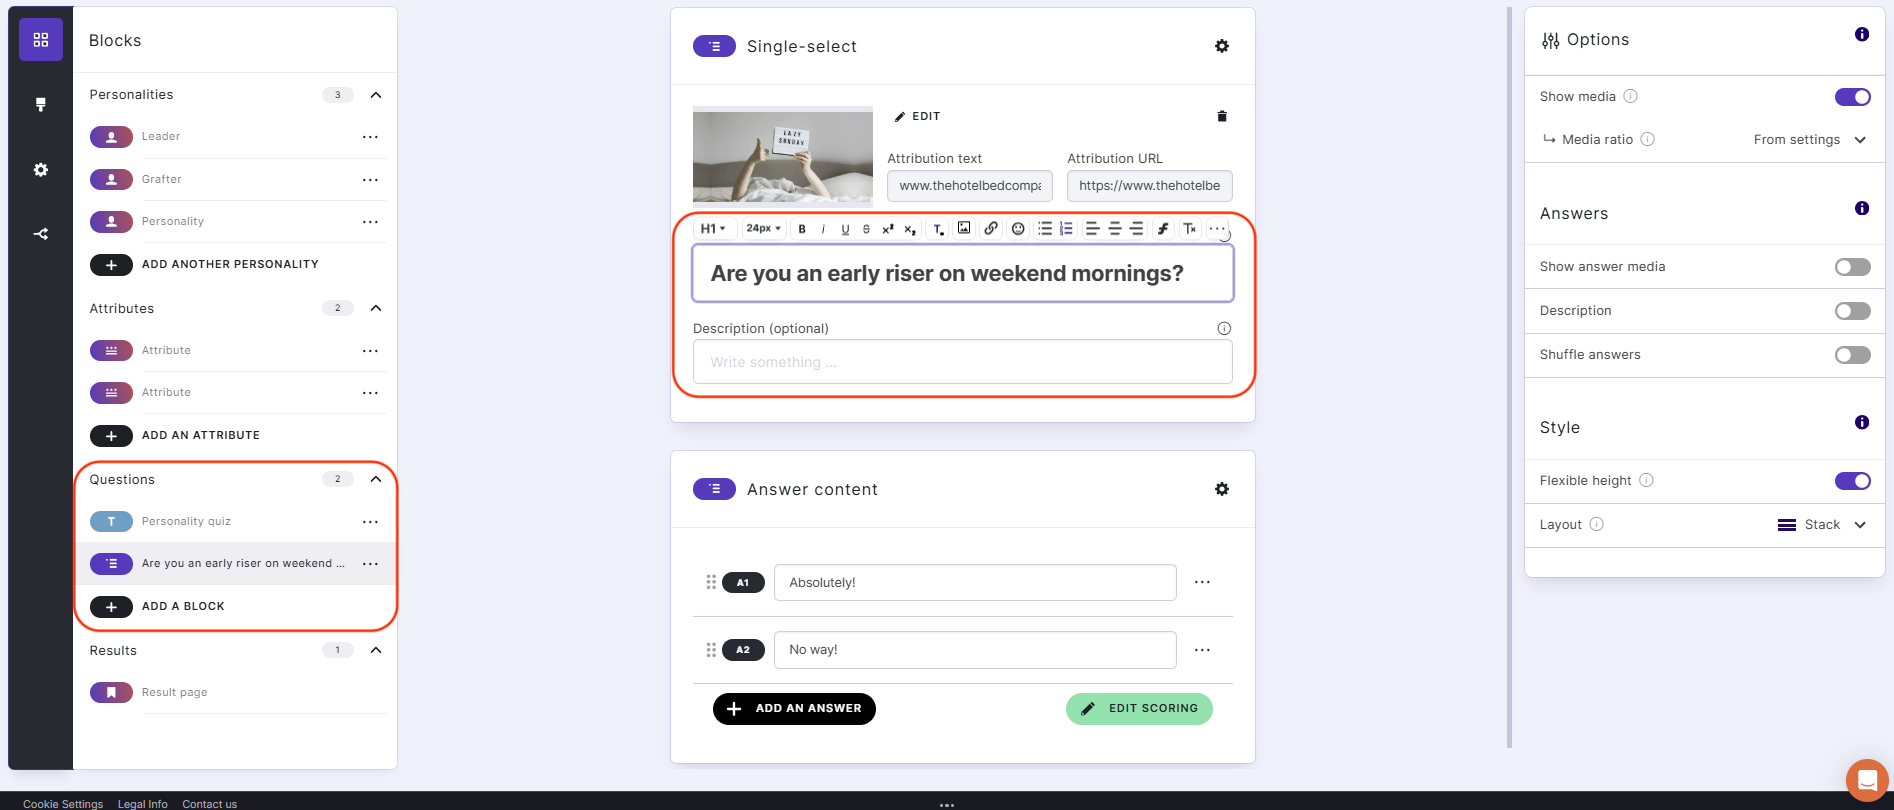
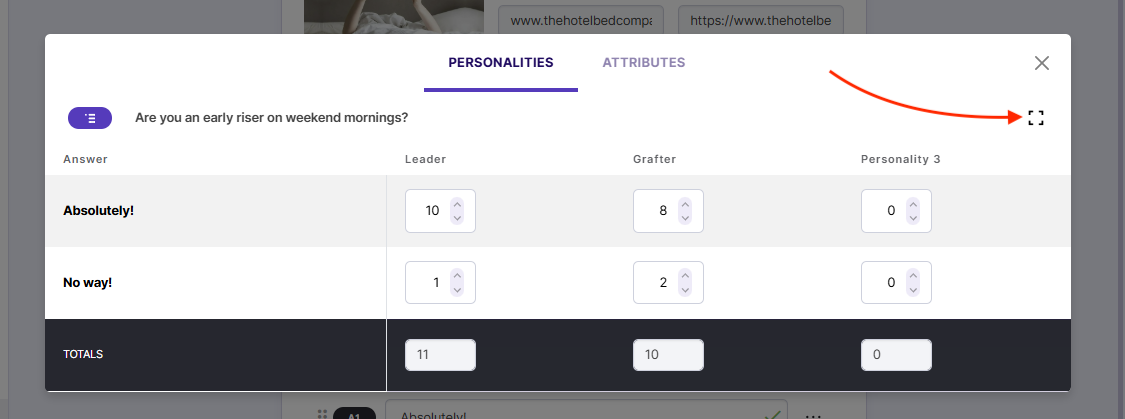
Click the green ‘Edit Scoring’ button to choose how much weight to add to each personality type and attribute according to the provided answers. If you have a long series of questions and answers, you can go full screen to see more at once via the square icon at the top-right of the pop-up box.
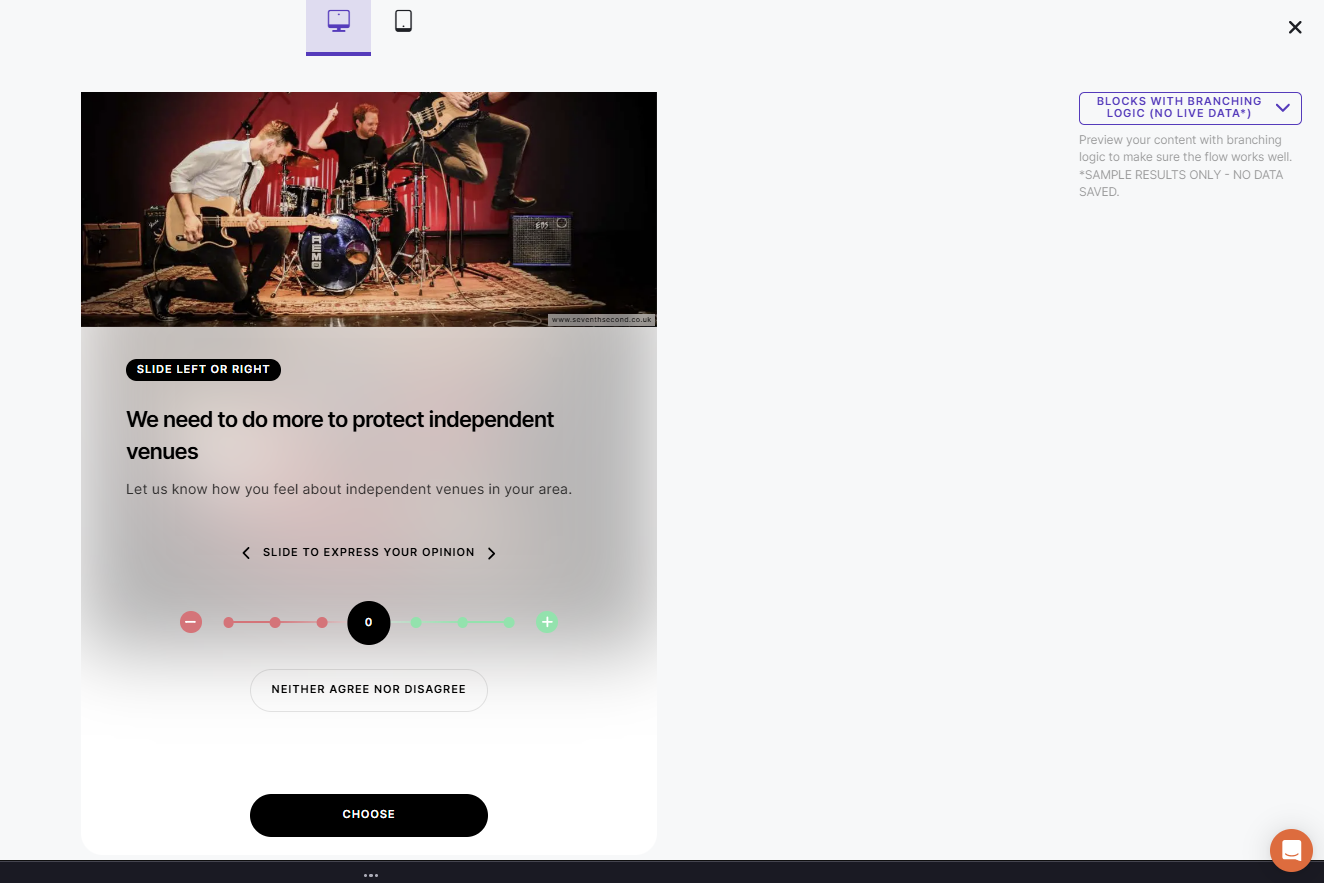
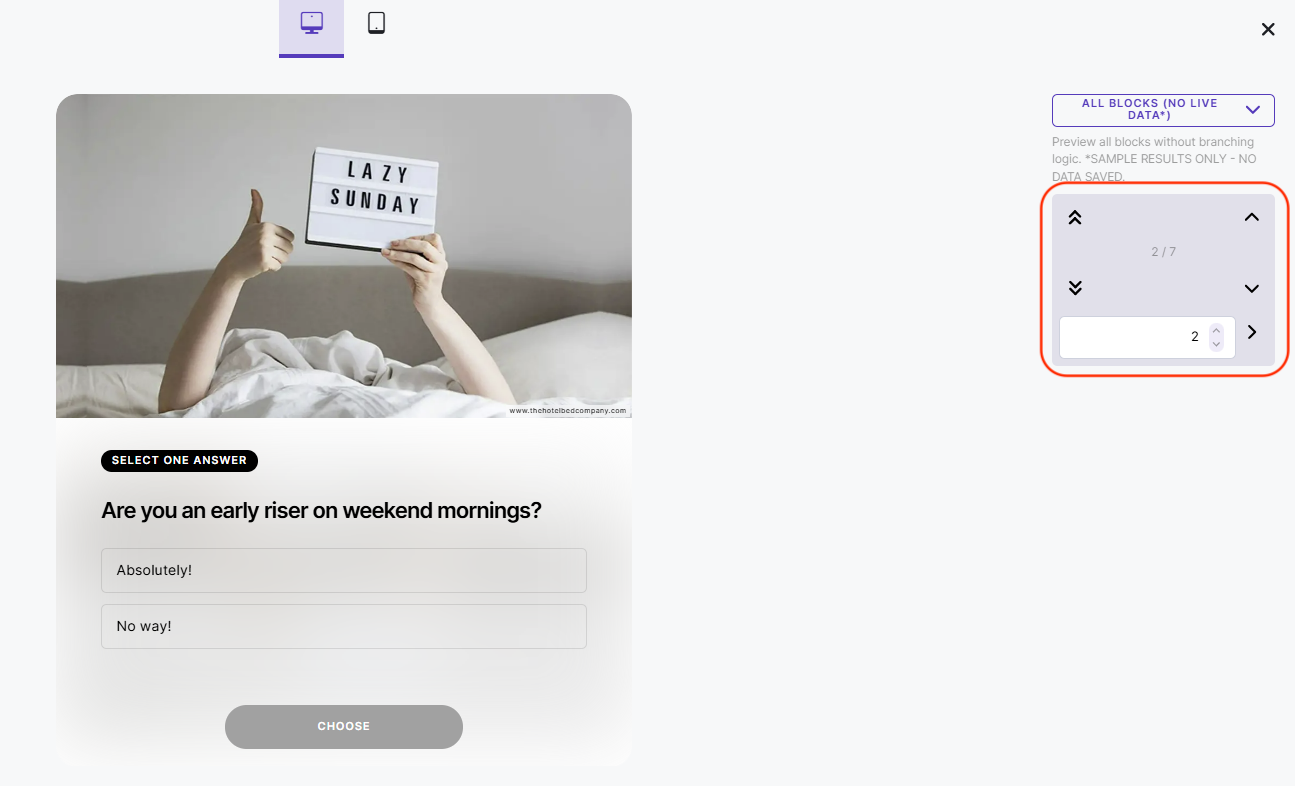
When in preview mode, you can cycle through the blocks in your quiz using the arrows on the right-hand side of your screen.
Once you have built a personality quiz you’re happy with, you can head to the status page via the ‘Publish’ button in the header to check for any errors. Critical errors will appear in red, while recommended fixes will appear in amber.
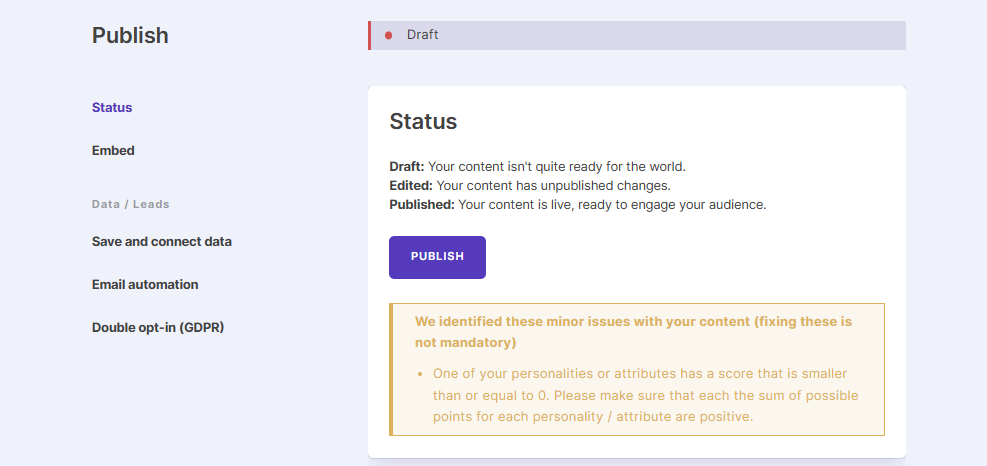
You can only click ‘Publish’ to push your quiz live once all critical issues have been fixed.
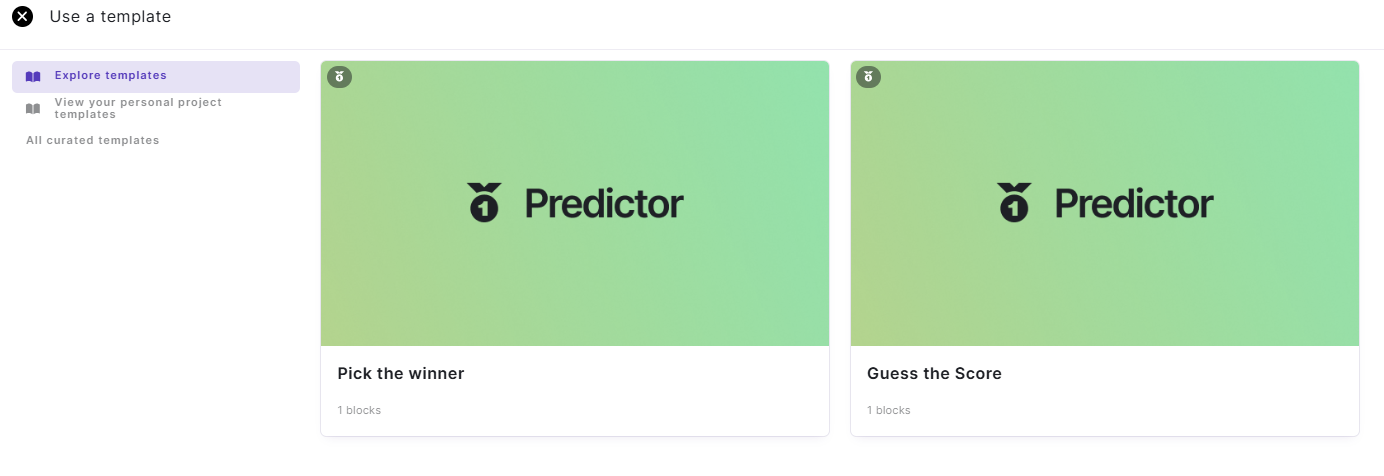
Predictors
You can set fun prediction-based challenges for your audience with the Predictors function, which has two set templates to get you started: Pick the Winner or Guess the Score. You can also start from scratch if you want to design your own.
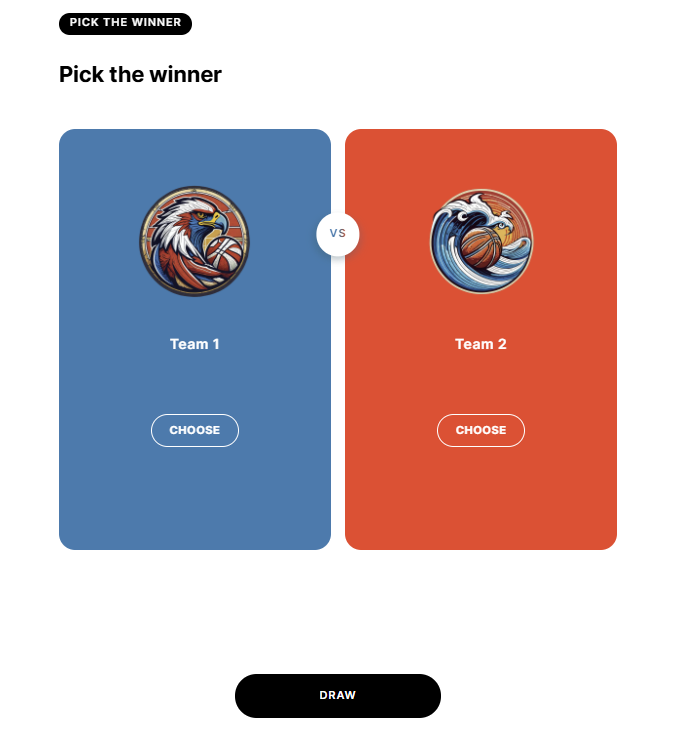
With Pick the Winner, you can pit two sides against one another and ask your audience to choose their favorite.
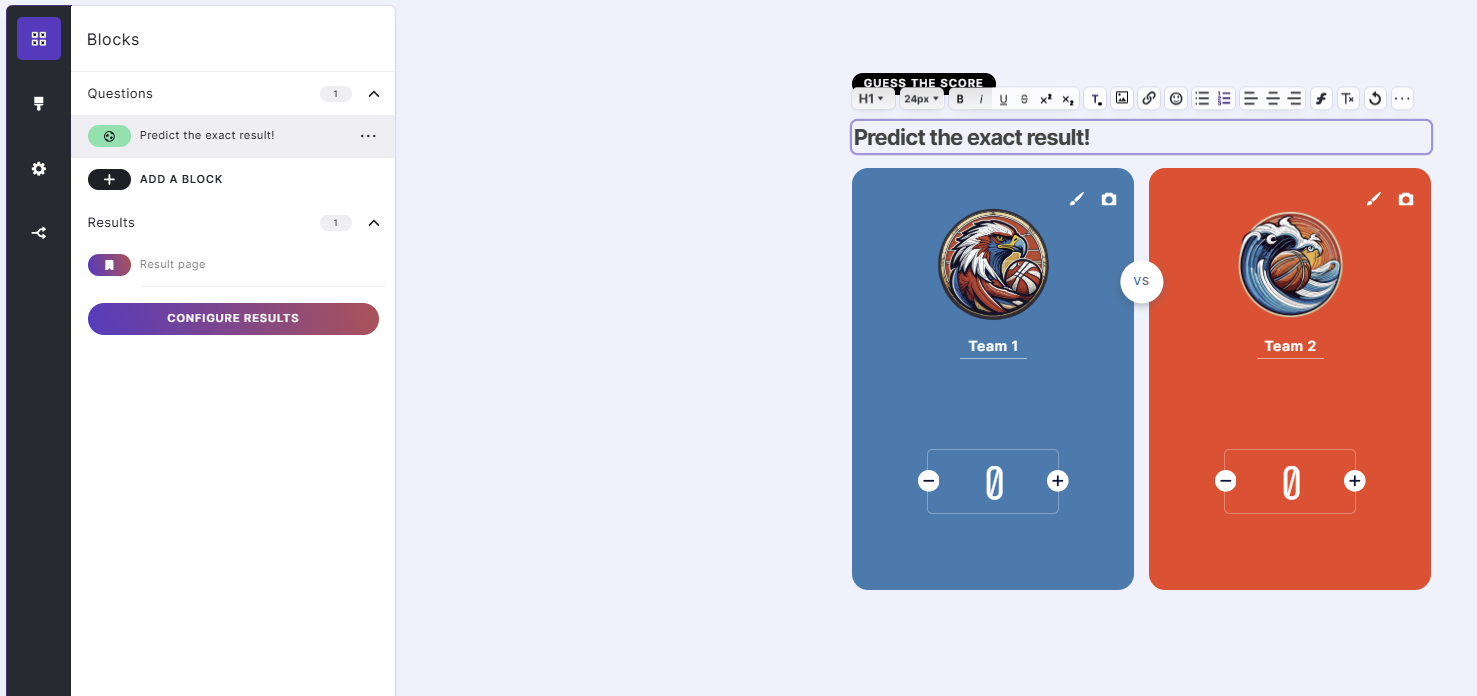
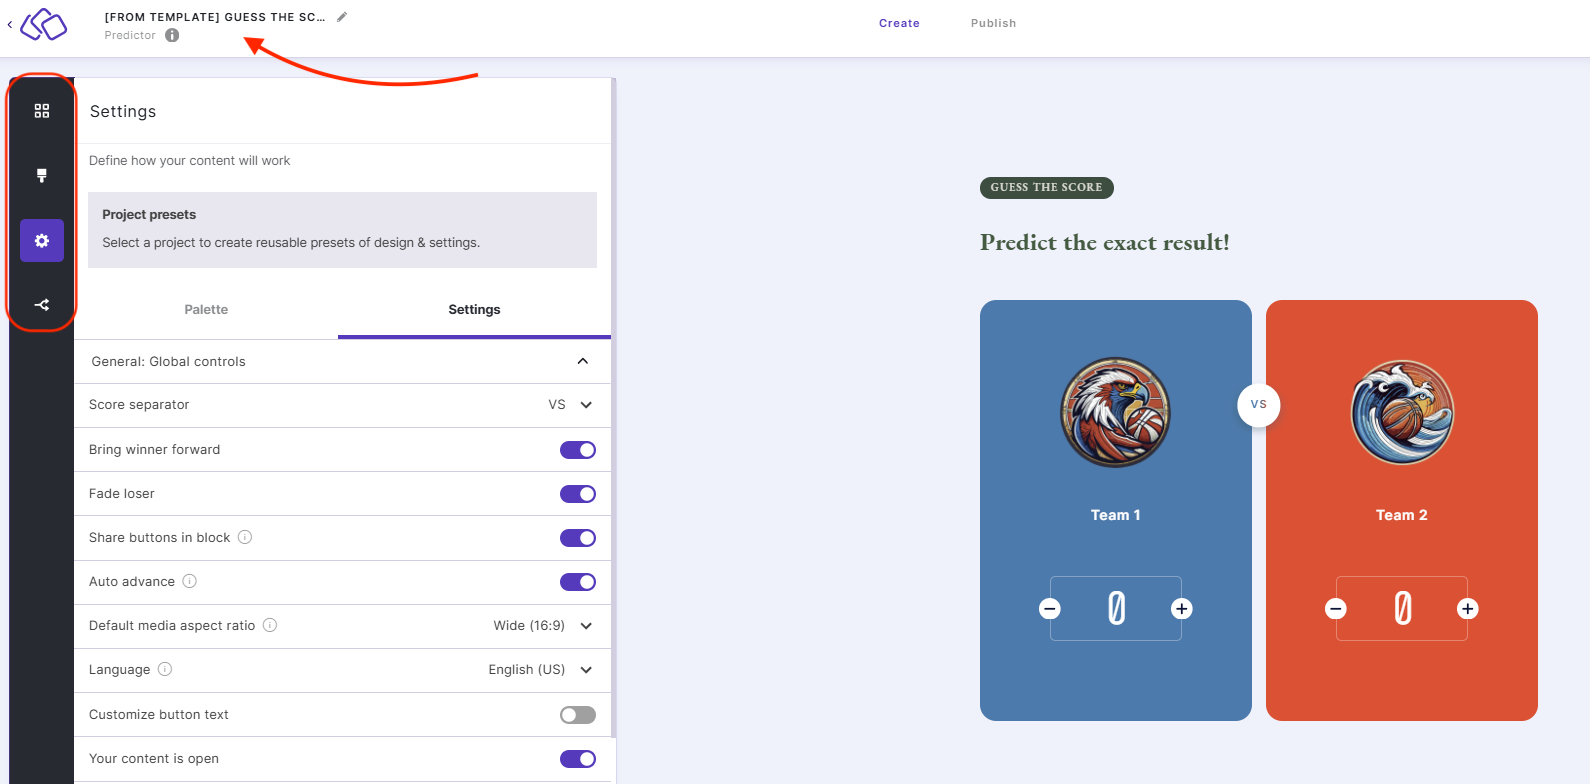
Guess the Score allows users to choose the exact scores of events and save them as predictions. You can edit any part of the blocks, including the text-based title at the top or the media by clicking on the image or the brush or camera icons.
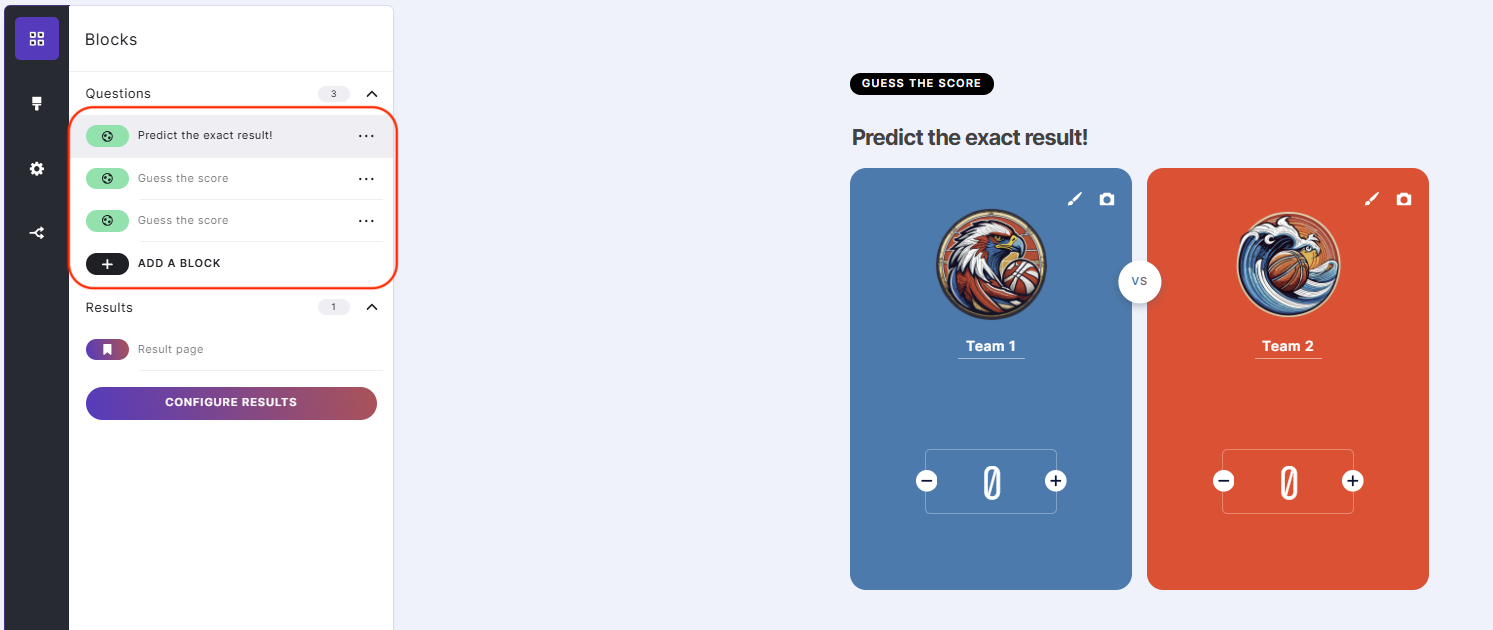
Add as many face-offs as you like via the ‘Add a Block’ button in the left-hand menu—this is a great way to ask your audience to guess the scores of every match in a soccer tournament, for example.
To change the palette or the settings of your predictor game, head to the buttons in the left-hand menu. To change the title, click on the line above ‘Predictor’ at the top-left of your screen.
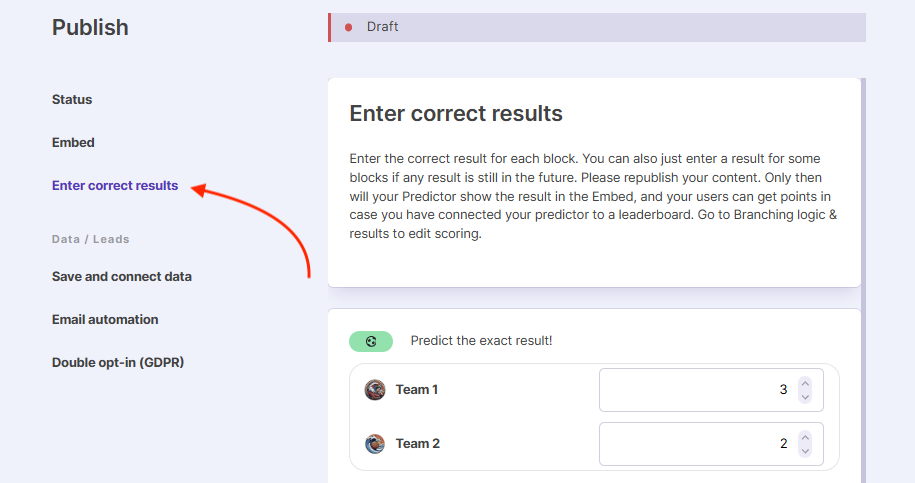
When you are ready to go live, you can use the same method as above to publish your quiz—click ‘Publish’ in the header and check for any errors first. Here, you can also add the correct results once they are known and republish your content to show them in the embed. Users will then be able to get points for correct answers and any leaderboard you have connected will update accordingly.
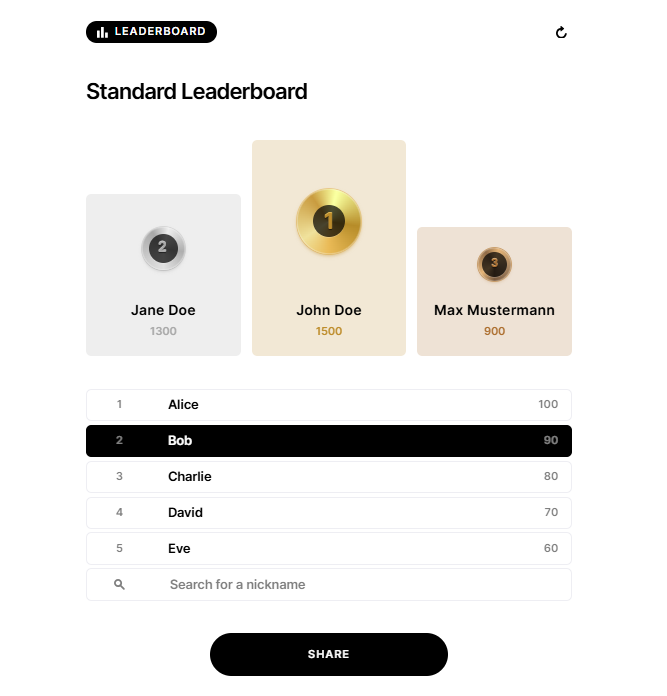
Leaderboards
The Leaderboard function allows you to gamify your quizzes and pit users against one another for prizes if you wish.
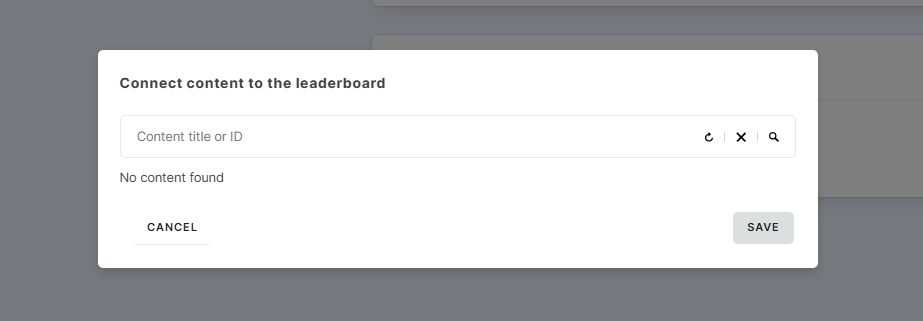
You can connect any content to a leaderboard as long as it contains a name and an email field as a bare minimum. Click ‘Connect Content’ to choose a quiz or predictor to link to a leaderboard.
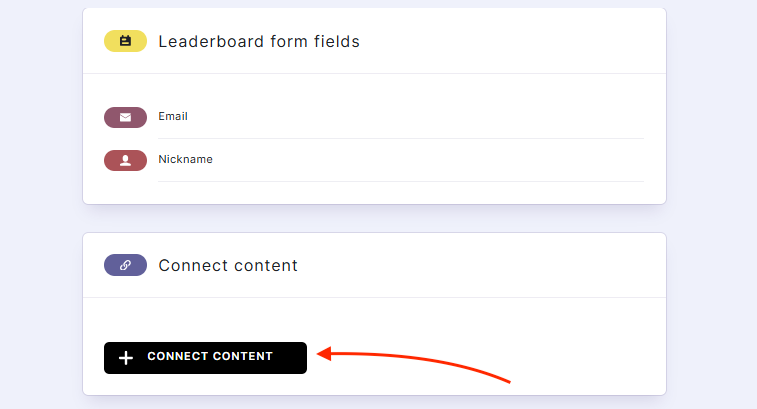
You can search for your content by its name or ID number, which can be found at the top-left of the screen when you’re in the content editor for any piece.
Forms
Quiz Maker’s forms allow you to collect emails and other information from your audience so you can start learning more about them. You might connect any piece of Quiz Maker content to a product page, for example, and ask people to enter a related prize draw or sign up for a free sample.
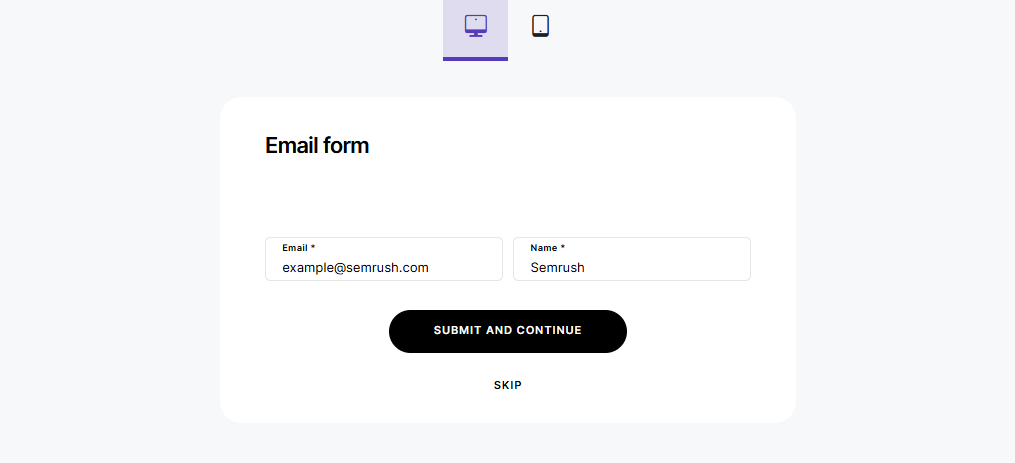
Building a form is easy—you can keep it basic by asking for a name and an email address.
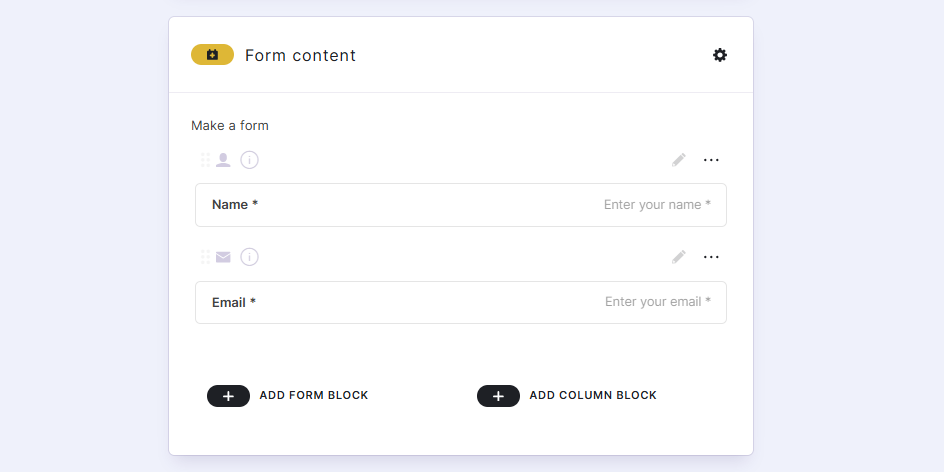
Click on the pencil icon to edit each field, such as adding instructions for filling it in or a notice to state that a field is required to continue.

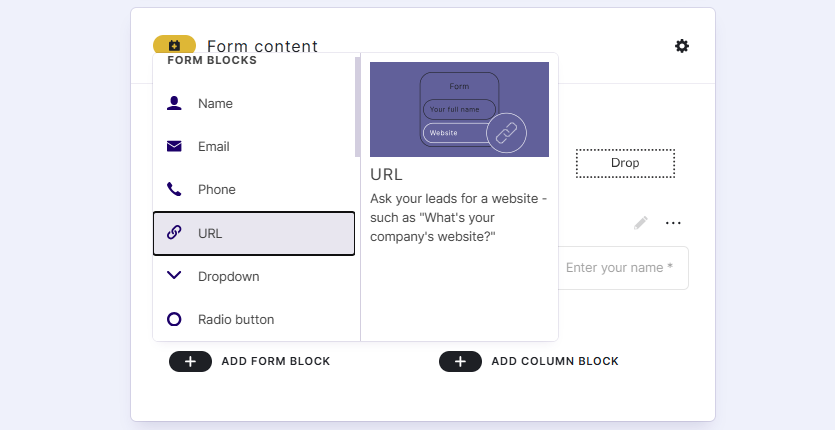
You can also add blocks to ask for additional details, such as company URLs and checkboxes for terms and conditions, via the ‘Add Form Block’ button at the bottom.
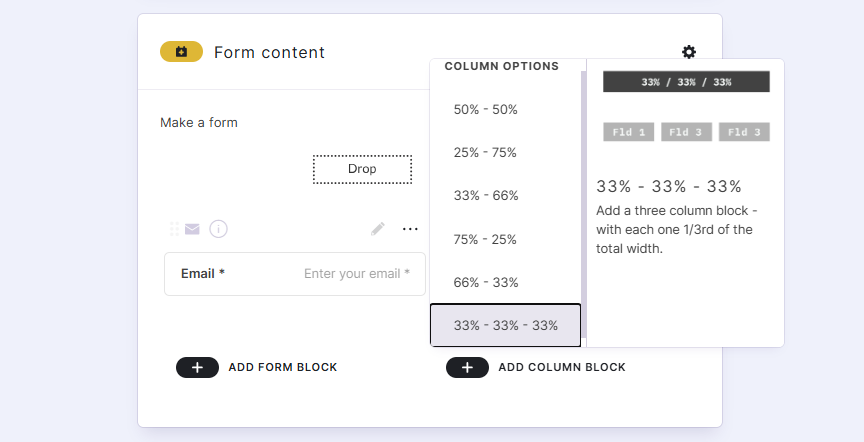
If you want to change the layout of your form, click ‘Add Column Block’ to choose column options.
You can preview your form once you’ve added all the necessary fields by clicking the purple ‘Preview’ button at the top-right of your screen.
Settings
If you want to manage your leads, customize any messaging or buy more credits or completions, head to the settings section via the cog icon at the top-right of your screen.
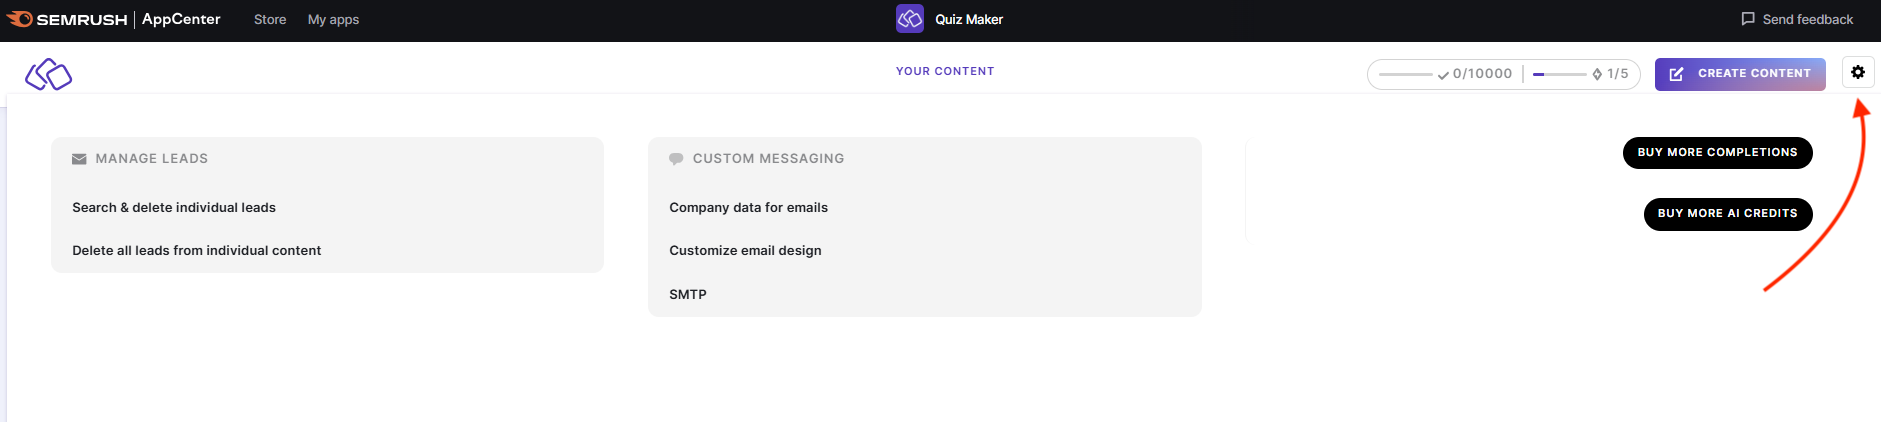
You can search for and delete individual leads using their email addresses via this section. It’s not possible to recover a deleted lead, so be sure you want to delete it first.

Frequently Asked Questions